


![[United States]](images/flags/United States.gif "United States")
So now that i'm back in the saddle and have actual free time again I figured it was time to build a new viv. As I like to do, I have documented the steps so folks can better understand what I am talking about when I post in other's threads on builds.
This is a new design type for me, and the first build of its kind in my collection. I am referring to it as a PVC Riser type vivarium.
Before I get started I ask that folks please not assault me with questions as to what I am going to put into it animal-wise. Truth is I do not know. I now prefer to build the project first, then find a critter or two that would do well in the enclosure. When I used to build vivs for pets I already had, I tended to hurry through steps sometimes skipping important points or making error that resulted in the ultimate failure of the project. This as you know, can be an expensive screw up. I will state that this project is with arboreal frogs in mind, but I am not certain that is what I will use it for. (Hence the build posting here on FrogForum rather than Caudata.org!)
Also, pardon the photos, it appears I have a fingerprint on my camera lens...
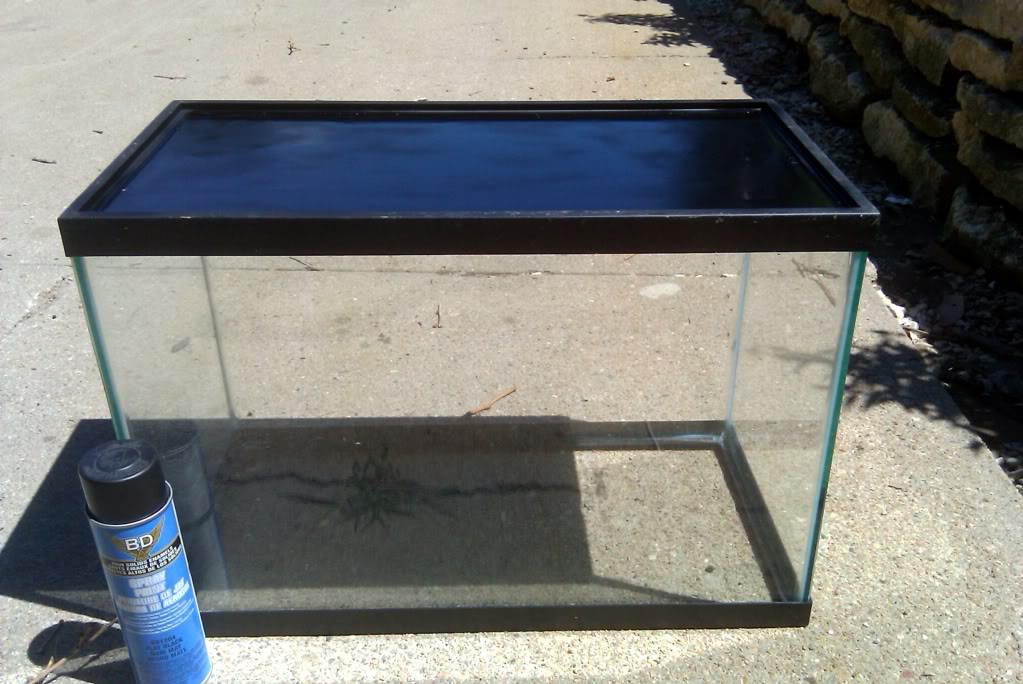
Step 1:
This is a 20 gallon(?) or 30 gallon(?) standard glass aquarium I picked up for a few bucks at a garage sale. It was used and filthy as most junk sale boxes are, so it was scrubbed out with a mix of hot water, sea salt, and chlorine bleach. It was then rinsed with a regimen of white vinegar and treated tap water. It was then hand dried, and left to sit under a UV sterilizer lamp for 4 hours. Once the cleaning and sterilizing was completed, I flipped the aquarium over and sprayed the exterior bottom with matte black industrial spray paint.
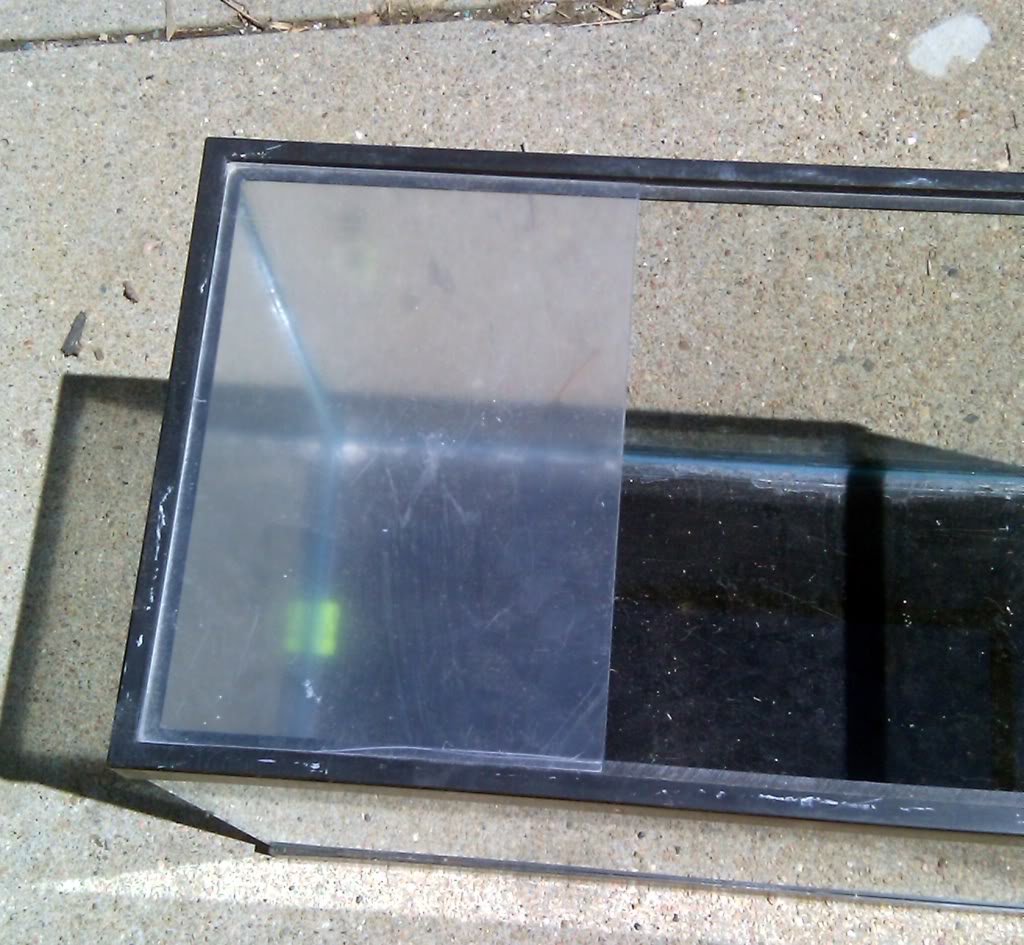
Step 2: While the first coat of paint was drying, I carefully flipped the aquarium rightside up and measured the frame opening in the top. I then cut a piece of 1/8 inch lexan to size to create a new "front" panel on the box.
Once it was scored, snapped and ready to install, I added the final coat of spray paint to the exterior and then siliconed in the new panel with standard DAP clear silicone. The intent on this step is not to "glue it" in place, but to create a permanent water tight gasket. Standard Clear silicones seal well, but DO NOT have the tensile strength to support the weight of water. Aquarium rated silicone MUST be used to prevent failure and leakage, especially when plastics are used as they are prone to bowing, expanding, and warping in some applications. Aquarium silicone is much stronger than standard and helps to prevent blow outs.
Step 3:
While the paint and silicone are curing to a workable level, I spent that time finding and preparing the rest of the materials. In this case this included boiling rocks, cleaning gravel, and selecting real tree bark. I have a large supply of rock on hand in the form of various types of limestone and purchase standard aquarium gravel of a specific color I prefer on hand, so searching does not take long. I started up my fire pit and coated the exterior of my aluminum "gigantic boilin' pot" (purchased at the thrift store for a buck!) with liquid dish soap( original Dawn brand as it is the most environmentally friendly that holds up to fire), careful to keep it from getting on the rim or inside the pot. The soap coating allows you to boil water over an open fire and keep the resulting black soot from becoming permanent. Once you are done with the pot, you merely hose down the pot with the garden hose and give it a token scrub with a stiff bristled brush. The pot is like new in just a few moments!
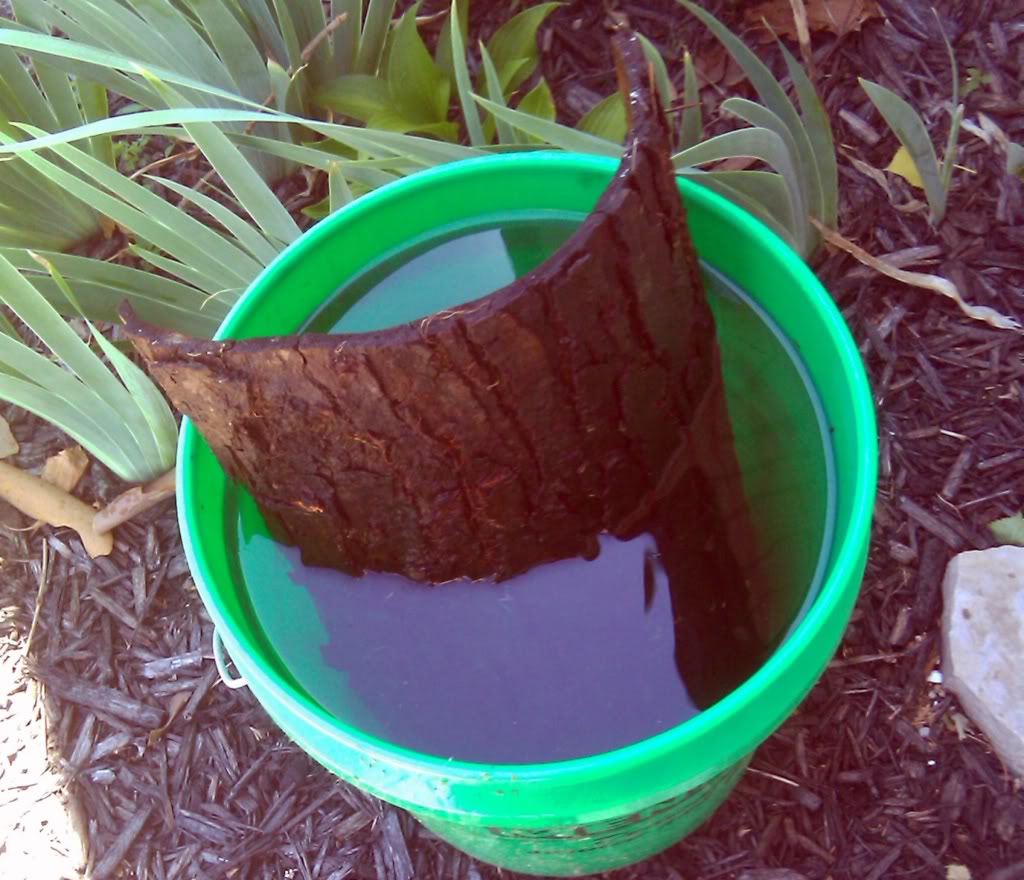
Since I am keeping a fire going, I got a choice beverage and then began to remove the bark from the well aged firewood I have on hand.(I was forced to cut down a huge silver maple tree last year due to extreme longhorn wood boring beetle damage and an infestation of carpenter ants) Thanks to a year long curing process for the wood, the bark is already loose on the logs and comes off in large sheets. once the fire was ready to boil, I filled the pot with the hose and placed it directly on the large bed of coals. I then banked the coals around the pot to a height of about 5 inches. This allows efficient boiling. While waiting for the eight gallons of water to boil, I placed the choice sections of bark into a five gallon bucket of tap water after scrubbing it down with the hose and a stiff nylon brush.
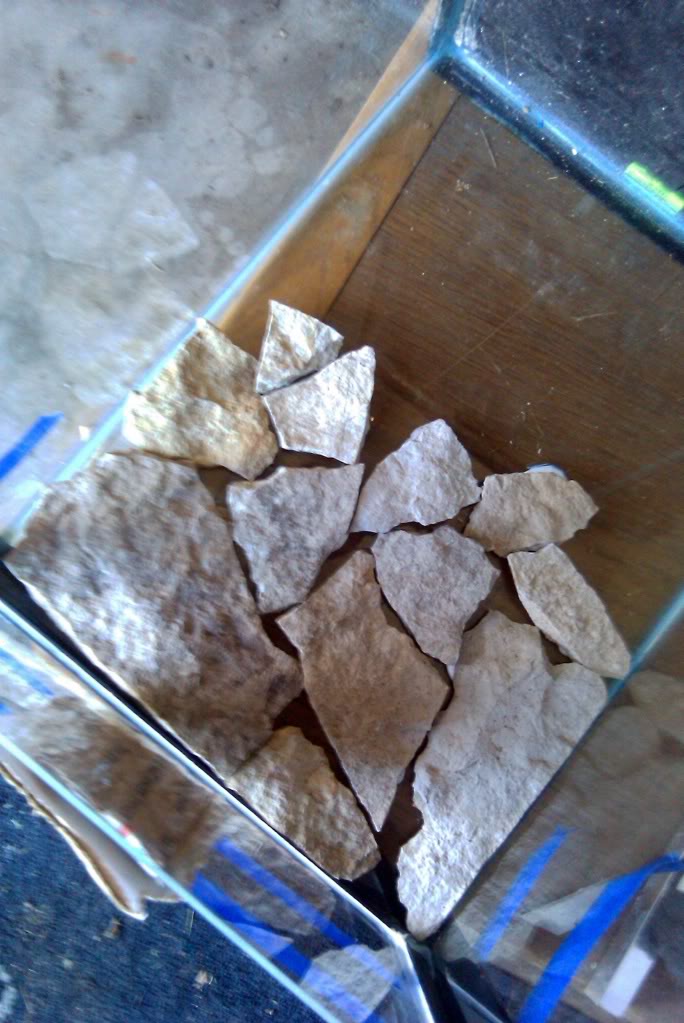
Step 4:
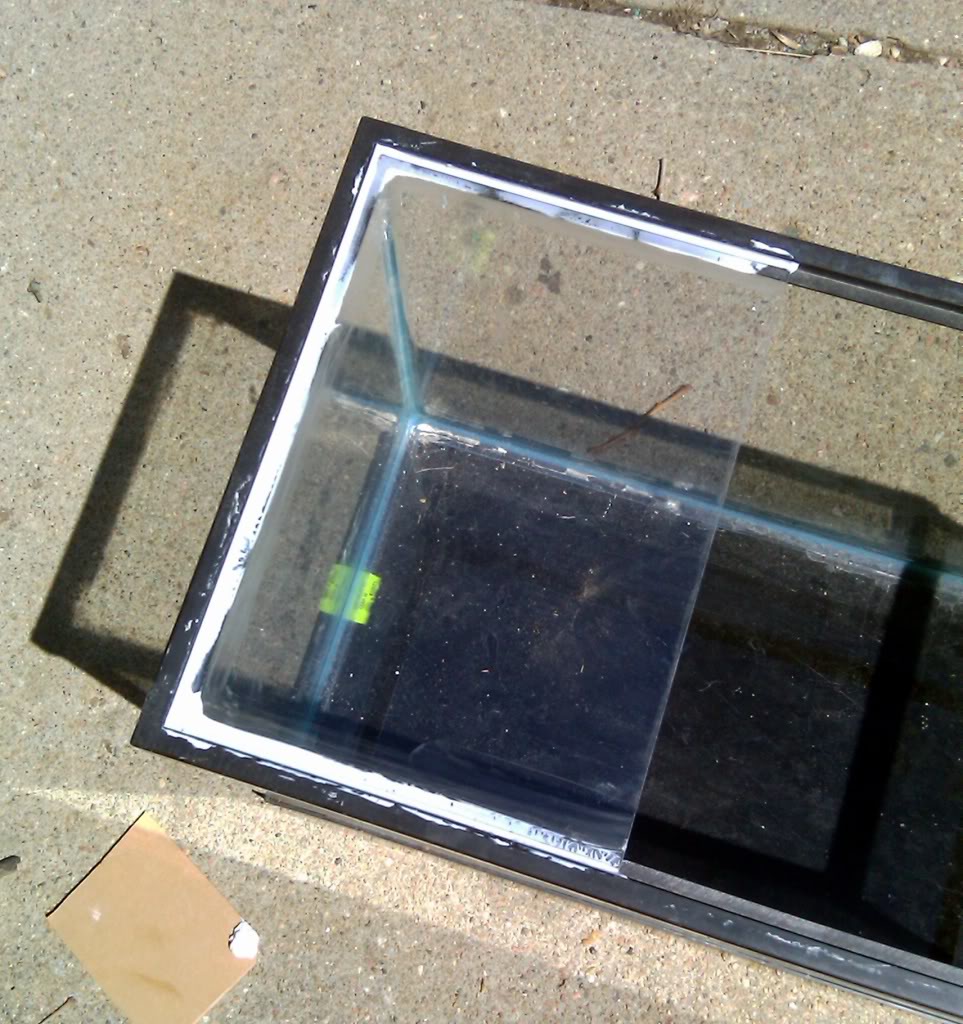
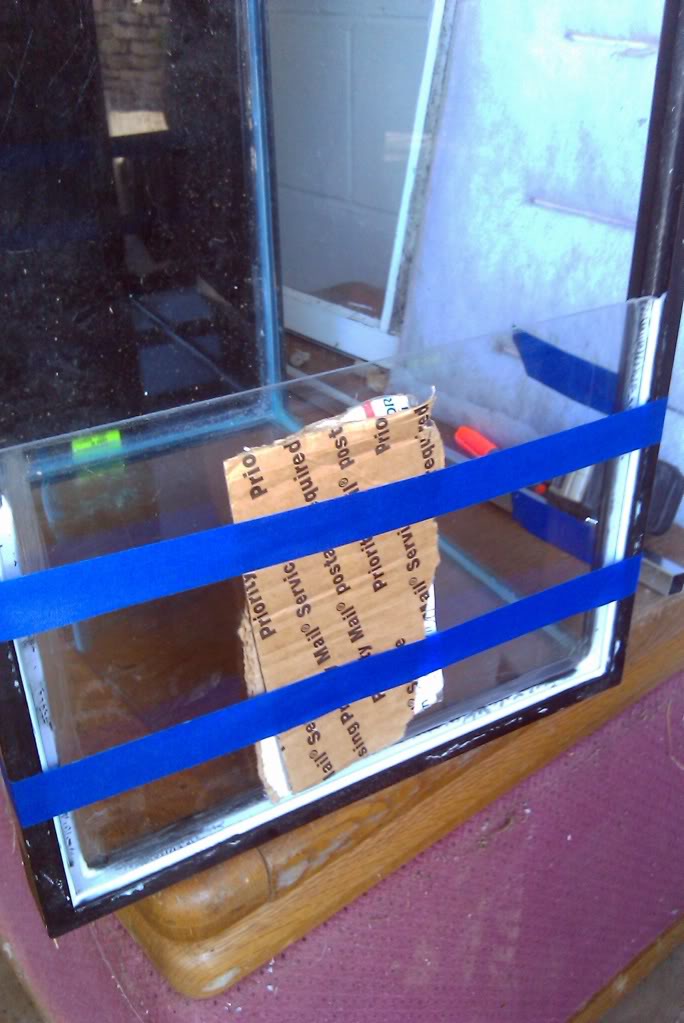
As I tend to build many vivaria, the rock I have in storage for the purpose is already cleaned, scrubbed and boiled. Before for anyone comments, yes it is limestone, however, my vivaria water (primarily rainwater) is all extremely hard in CaCO3 and is in fact aged with limestone due to the chemistry of my tap water. After choosing the pieces I wanted, I stood the now workably cured vivarium on end and proceeded to glue the rocks in place with standard clear silicone. At this time, I also trussed the new front panel in place with painter's tape and some scrap corrugated board for support. I then applied a bead of DAP aquarium rated silicone over the standard sealant to provide the structural strength needed to support the weight of what will be roughly 2.5 US gallons of water. (about 16lbs of weight)
Step 5:
I left the now vertical tank to cure to a workable state and grabbed my now soaked through bark out of the bucket. Soaking the bark until it is fairly water logged helps control floating while boiling and ensures proper thermal transfer for sterilization purposes. I set the bark to boil on the fire and stopped for a long lunch and a few rounds of video games.
After roughly an hour, I removed the boiled bark from the pot and set it to drip off in the sun. Once the worst of the dripping was done, I set my oven to 210F and placed the still soaked through bark directly on the rack. I placed a large cookie sheet underneath to catch any bits that might fall off to help prevent fires. I baked the bark concave side down for thirty minutes, then flipped it concave side up. I then raised the temperature of my oven to 300F and placed a small metal pot of water on the cookie sheet. In addition to the additional sterilization effect of the heat the high temperature and high humidity from the pot of water caused the bark to curl even more. (This was deliberate on my part. All will become clear next step.) It also quickly dried the bark to a workable state. Bake time was 40 minutes under constant supervision to prevent fires.
[no photo for this step as nothing is more boring than watching bark bake.]
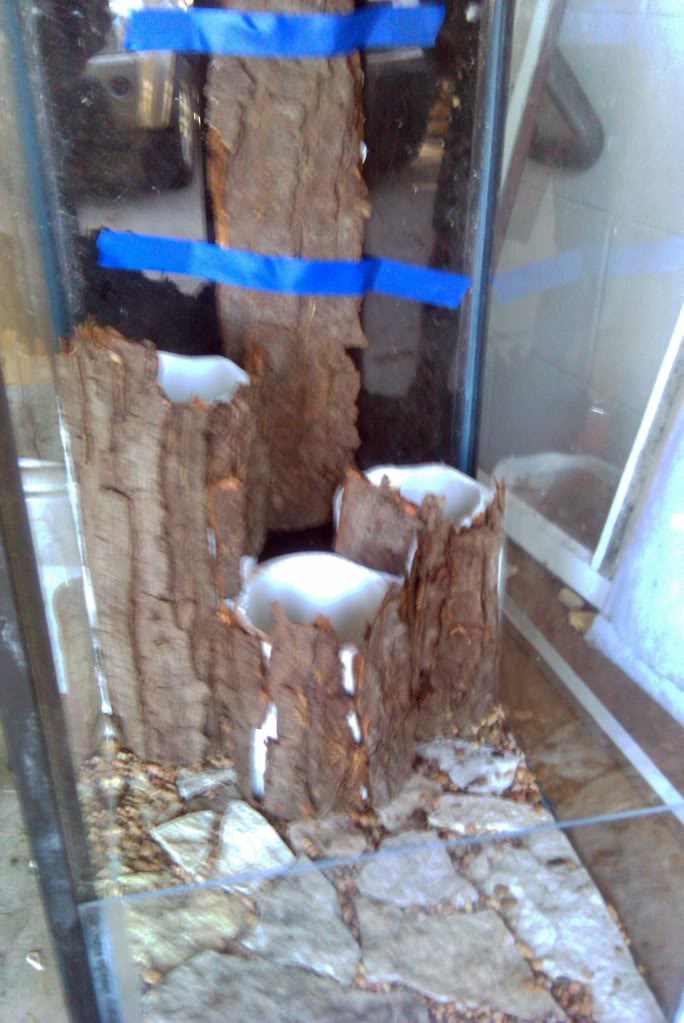
Step 6: While my now very hot bark is done, I set it on the stove top to cool and spent time silicone gluing three sections of 4 inch schedule 40 PVC drain pipe to the new bottom of the tank, aft of the rocks I glued in place earlier. The sections were siliconed with a thick bead around the bottom edge and pressed into place. The vertical edges were then siliconed in between each section and the sides of the tank to create three watertight, open ended cells, with the spaces in between completely sealed off from the water section of the tank floor. A small damp sponge was used to work the thick beads into smooth unobtrusive seams. I used White GE2 silicone for this as the structure of the PVC is strong and heavy, thus keeping out the water well on its own. I then left the tank to cure to a workable condition. I also filled in the gaps in the floor with a 50/50 mix of aquarium gravel and aquarium rated epoxy.
Thanks to careful planning and measurements, the bark I oven dried earlier was curled so that the resulting inside diameter was similar to the outside diameter of the pipes. I carefully broke the bark into pieces and gluued them to the pipe sections with GE2. Some vertical pieces had to be held in place with painter's tape to resist gravity. I was forced to leave the project to cure some more as I had missed a small piece of bark in the bottom of the oven which ignited while my wife was making Swedish meatballs for dinner. I figured this would be a good time to take a break. My wife figured this was a good time to outlaw anymore wood baking in the kitchen. good thing she works a different shift than I do. What she doesn't know won't hurt her....
Step 7:
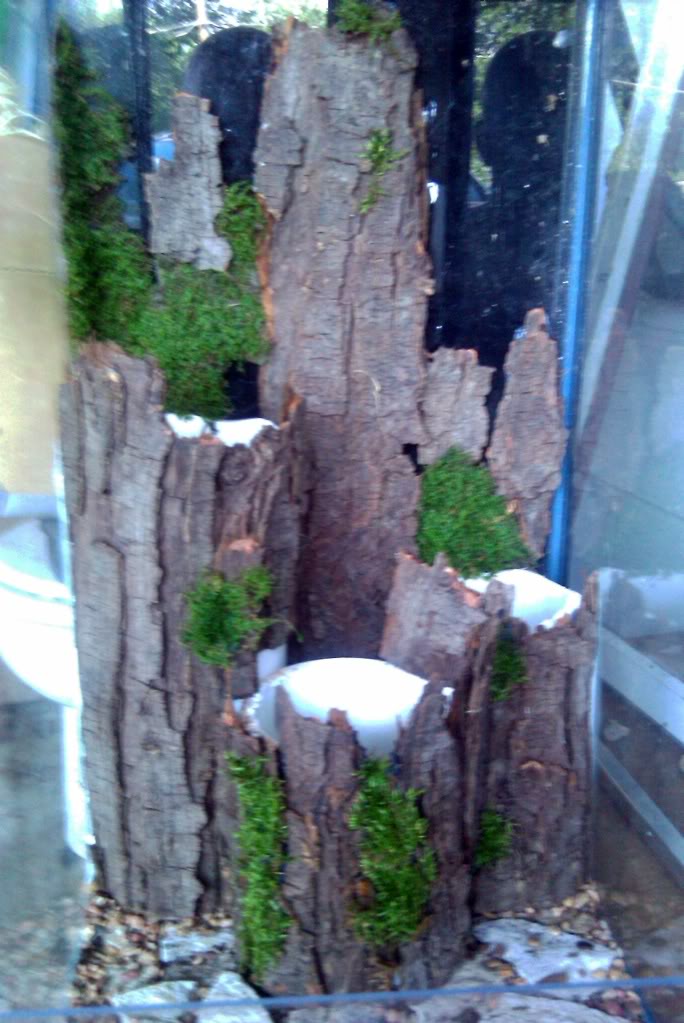
After a few hours of dodging Mexican expletives and a shoe or two, and extinguishing the fire in the oven, I enjoyed a meal of maple-smoke flavored Swedish meatballs and then headed back to the garage/workshop to do some more work. I installed starter swatches of local temperate mosses I cultivate in my backyard high enough up that my pug-dogs are unable to biologically claim them as "theirs". These were very carefully glued in position with the smallest dab of silicone.
I grew these mosses on old thick wool cloth cut from a hideous shirt I found at the thrift store. The cloth was soaked in a mix of raw buttermilk and Bisquick baking mix. I then spread a blender mix of buttermilk and spore bearing mosses I found in the woods last year onto the cloth. I then took these stinky, treated strips and placed them on some limestone flagstones in a box with a hardware cloth top (to keep the raccoons out of the buffet!) and forgot about them for a year. Other than making sure the moss stayed moist during dry spells, I let nature do its thing. The result was thick mats of moss in easy to handle, easy to glue in place strips.
So ends this installment. Due to the amount of adhesives used and the weight involved, I now have to wait at least a week, probably two for all the silicone to properly cure. Once I get there, the next steps involve soil, live plants, more live moss, and more wood. In the meantime, I will go about constructing the new front door for this unit, which I will detail in another post soon.
Watching FrogTV because it is better when someone else has to maintain the enclosure!

![[Ireland]](images/flags/Ireland.gif "Ireland")

Awesome Johnny. Looking forward to the next installment. A note on the UV sterilization - you shouldn't need to do that once you've put bleach in there.
Founder of Frogforum.net (2008) and Caudata.org (2001)
Wow, a lot of great info and a cool build,. As John said, I can't wait for more.
We did yogurt and blended moss to coat the new compost bin to speed the coverage process.
True, but I have the UV box on hand, and it has the added side effect of making damage to the glass and factory silicone really easy to see with filter glasses.Originally Posted by John

Watching FrogTV because it is better when someone else has to maintain the enclosure!
Must....see....more....I'm in withdrawal!
I need more pics too,please!!!!

Very ingenious idea on the moss cultivation. Good work.
Also, I know you said to stay away from talking about in habitants, but when I saw how you were incorporating the pvc, I thought to myself "Milkies!"
Not sure if the moss and bark would hold up in a high humidity environment tho.
Whatever you keep in there I'm sure will thrive!
Azureus Matecho BYH Citronella Regina White's TF
Josh (aka jwthought81)
As of today, all the adhesives and sealants are cured completely. I started the screen door, but it was a failure! So, on Saturday I am off to the local DIY store to get more parts and to get the plants and. Look for the completion of this thread this week!
Watching FrogTV because it is better when someone else has to maintain the enclosure!
isitdoneyetisitdoneyetisitdoneyet!
I like how nice and easy its illustrated. Pics make a deference. This tank is a 20 or 29 high. Nice, cant wait to see more.
looks very interesting so far
Nice i cant wait to see what u do next! Its very zennly set up so far! What kind of plants are you puttin in there?
There are currently 1 users browsing this thread. (0 members and 1 guests)
 Posting Permissions


 Reply With Quote
