Well, I picked up used 29 gallon tank that is practically new. Started messing around with some ideas today
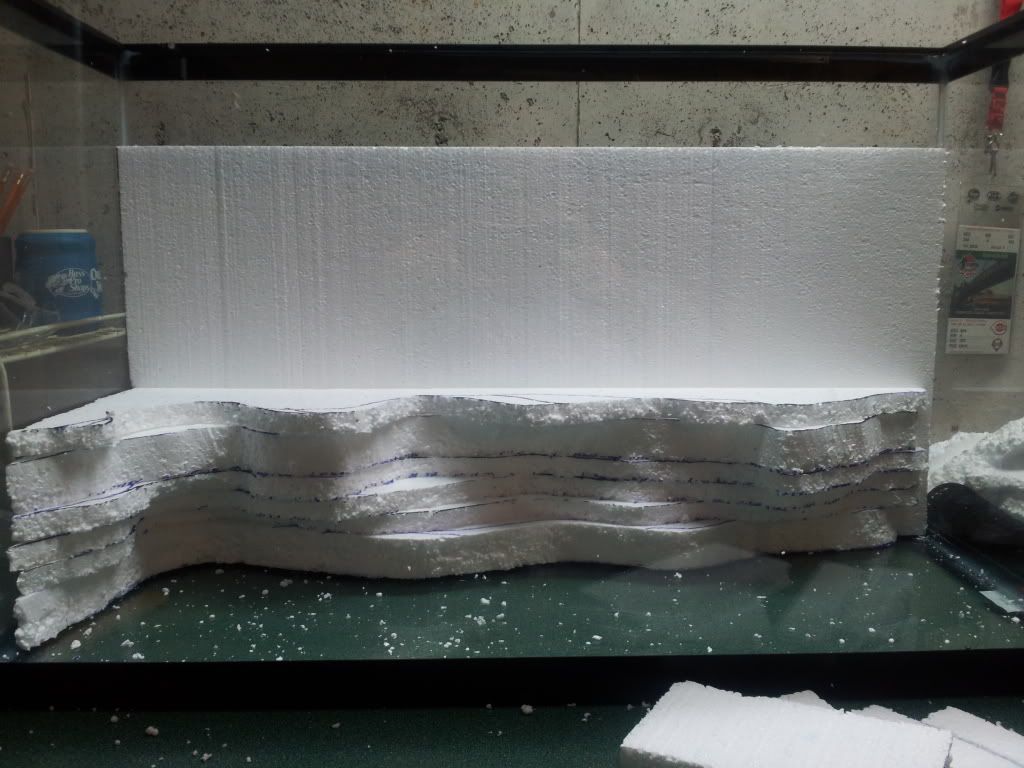
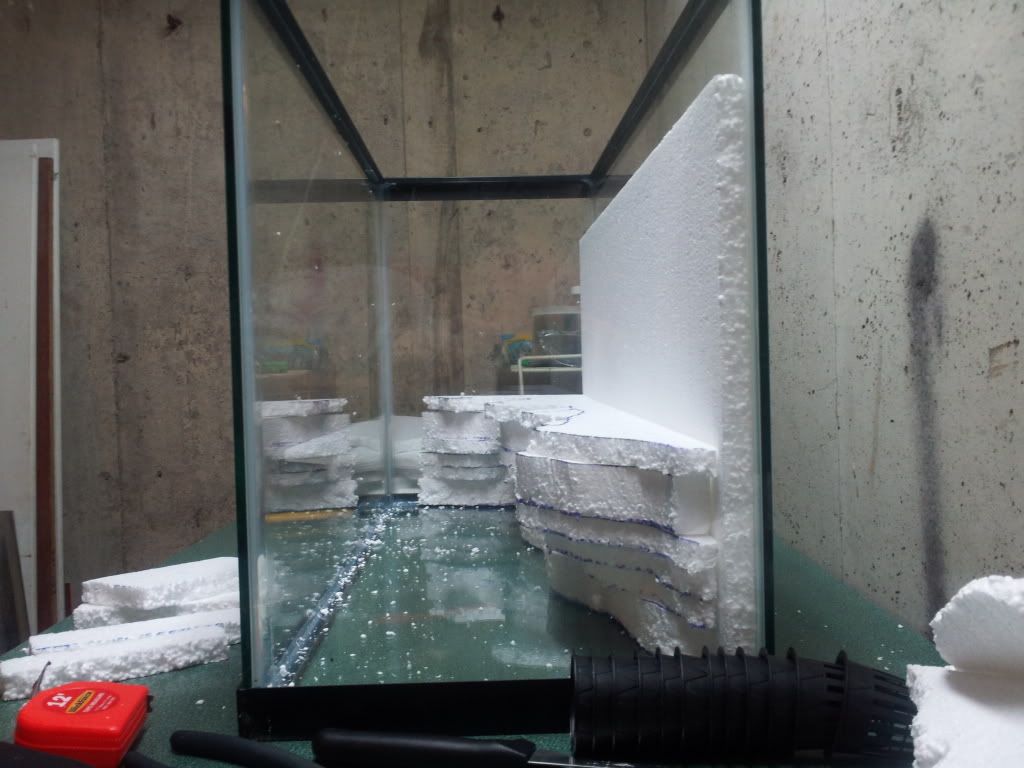
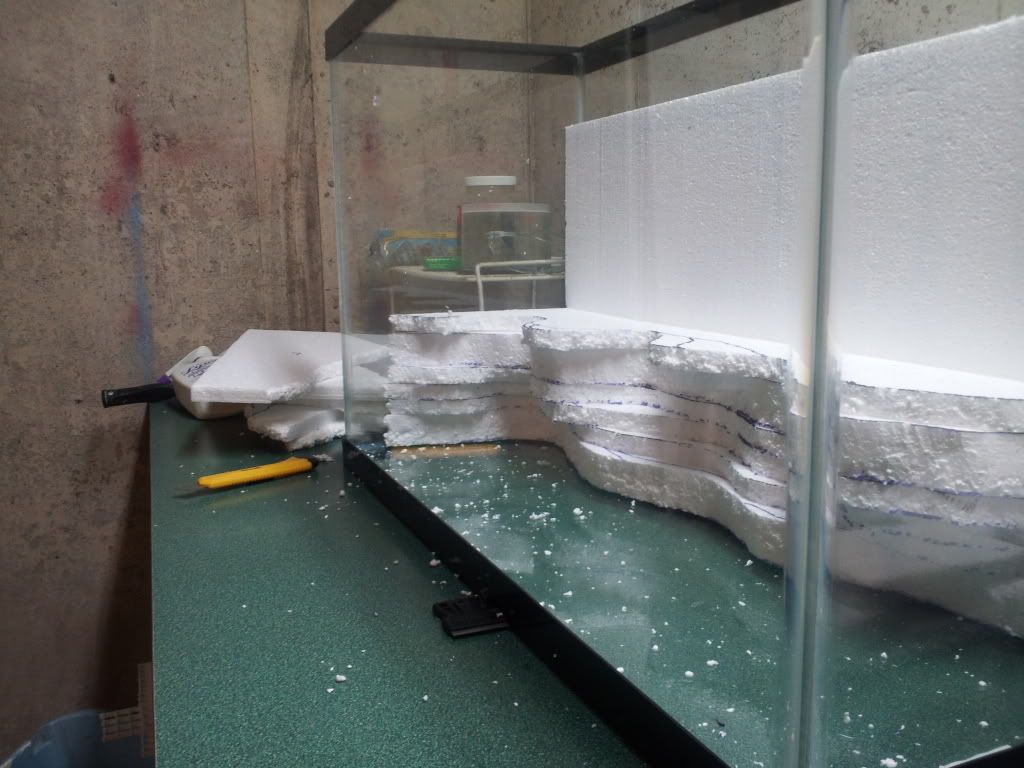
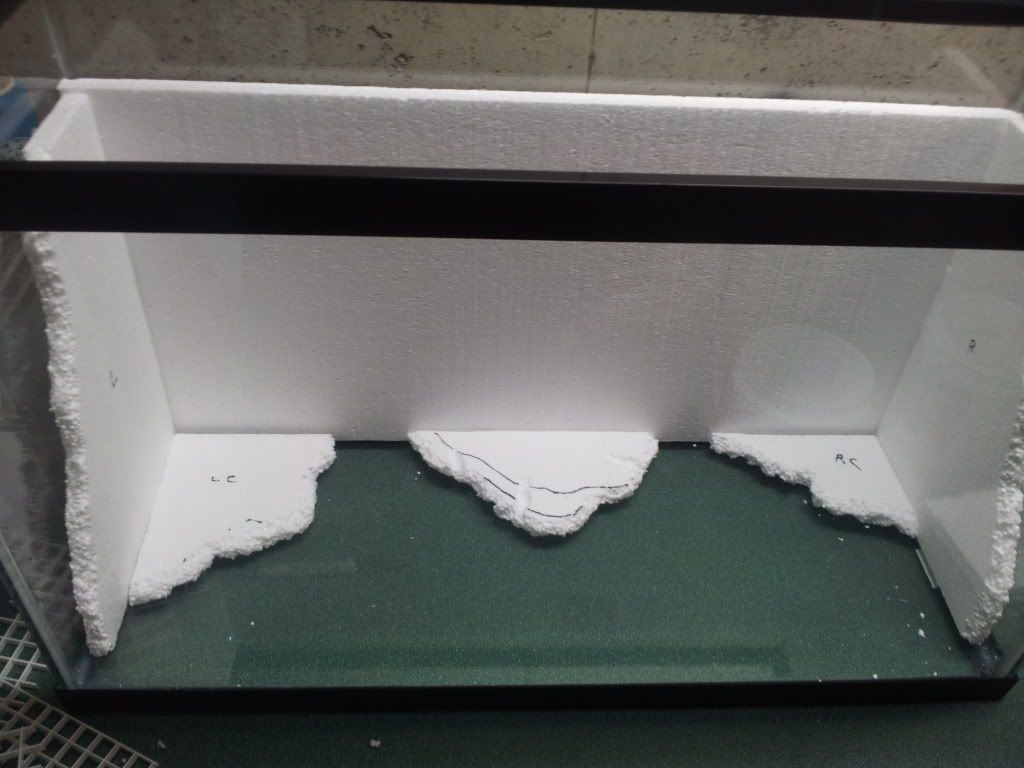
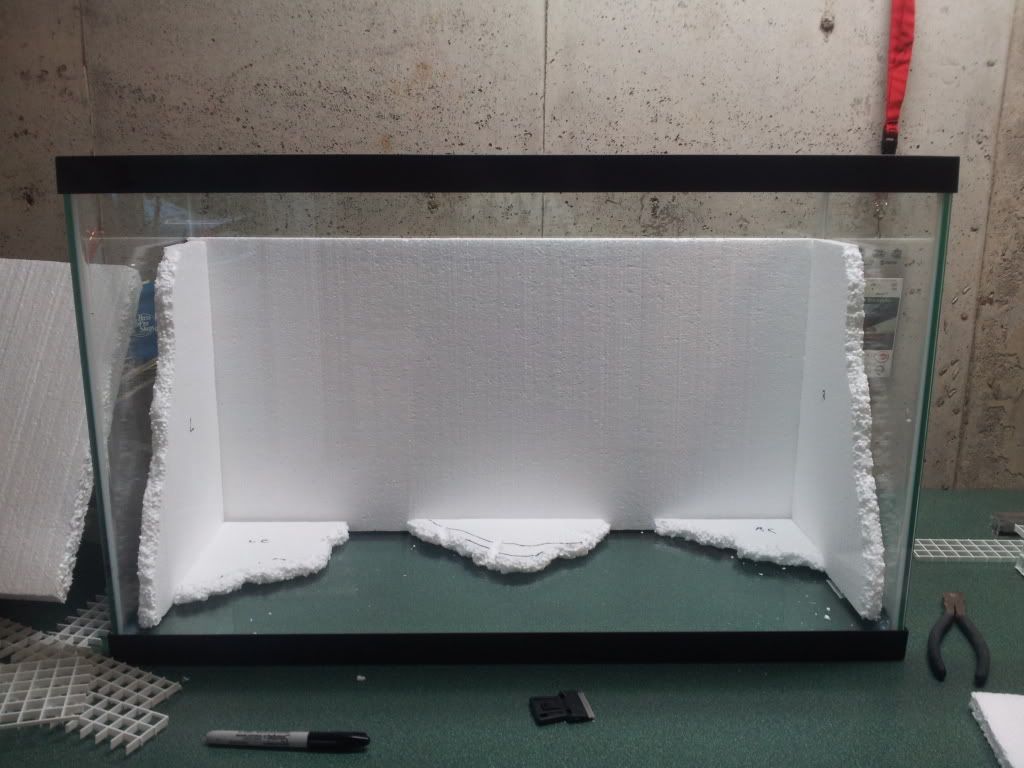
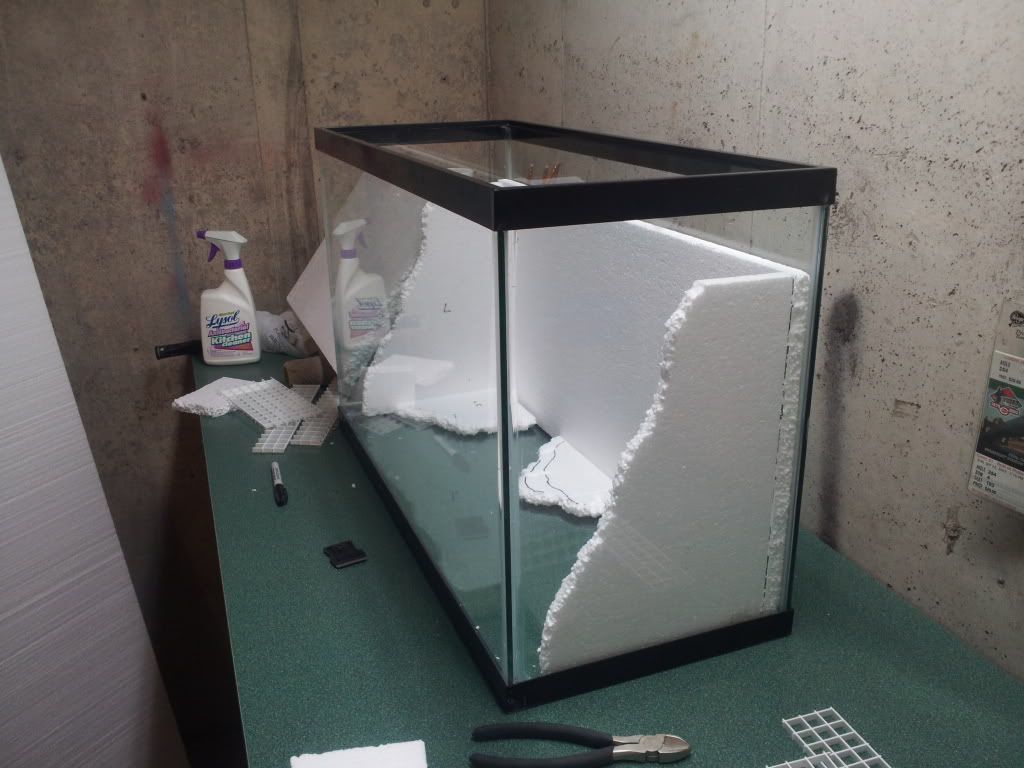
The styrofoam background will be pushed to the top of the tank when its complete it's just sitting at the bottom so that i could picture what i was doing
I'm contemplating a water feature for this build but can't really decide if I want to or not. The thing that's messing with my decision is that if I did a water feature i'd want to drill the tank, and though I had no issues drilling my 10 gallon, I don't know if i want to take the chance on this one because drilling glass is not fail safe and also don't really have any idea of what kind of pump i should get if I did decide to do the water feature. I really wanted to experiment with a water fall, but i kind of what to keep this simple as well
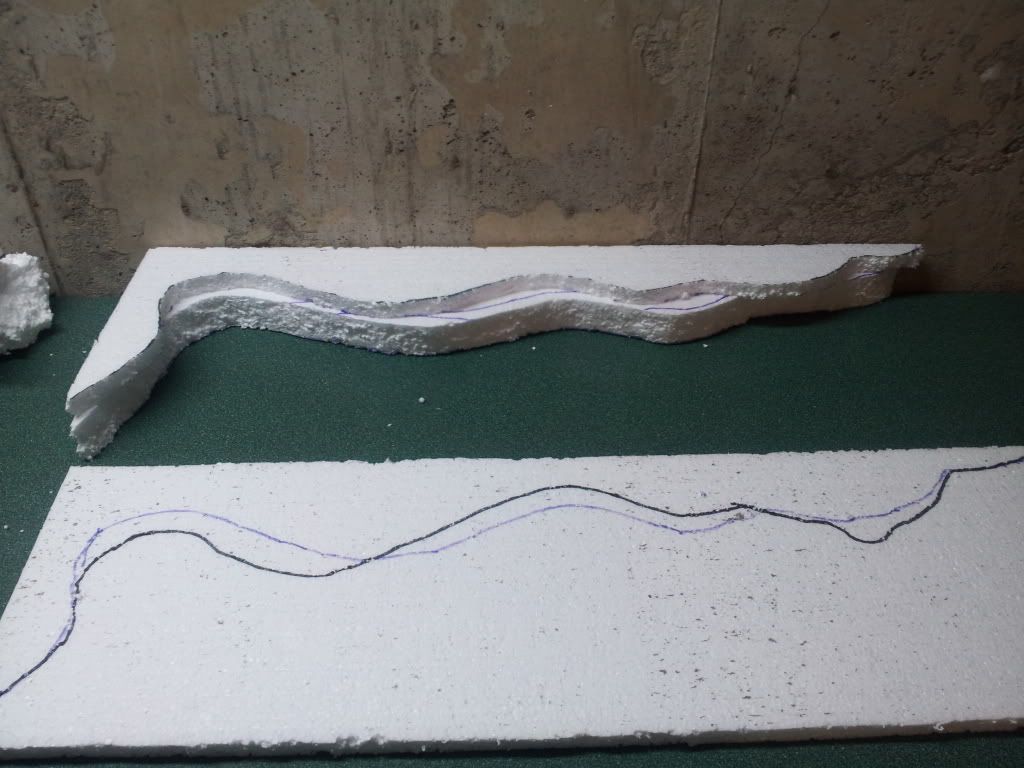
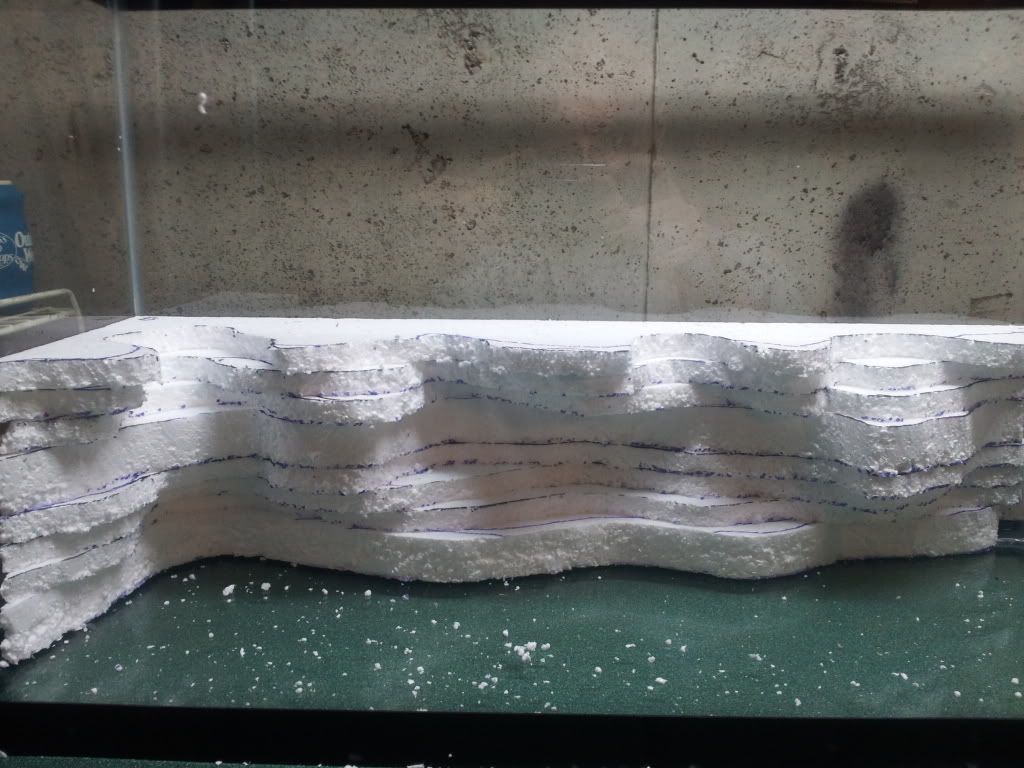
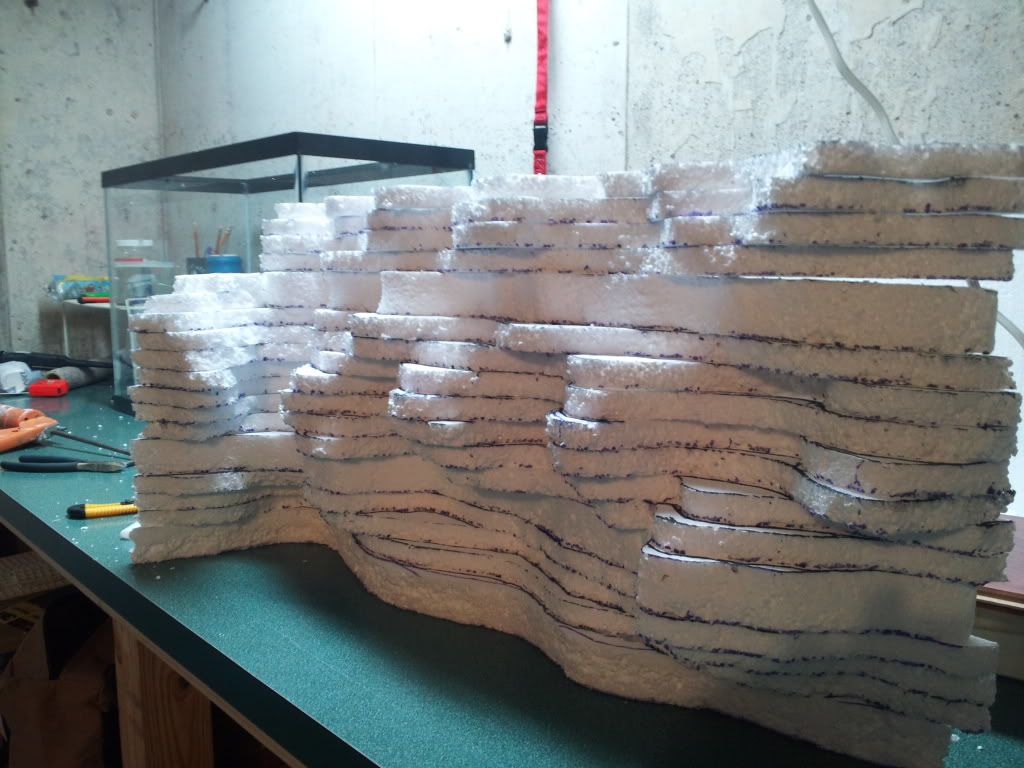
Friday night and some cold beer and a trip to home depot and i started to put this in action. I scraped my original idea and went with a stack method I saw on youtube. I bought a 4' x 8' by 3/4" thick styrofoam insulation. This stuff had a plastic sleeve on one side and a foil sheet on the other. Kind of pain to remove but not too bad. What I did was make myself a 29" x 9" rectangle out of cardboard as a template to cut out a bunch of panels. After i had all the panels cut out I started working my design
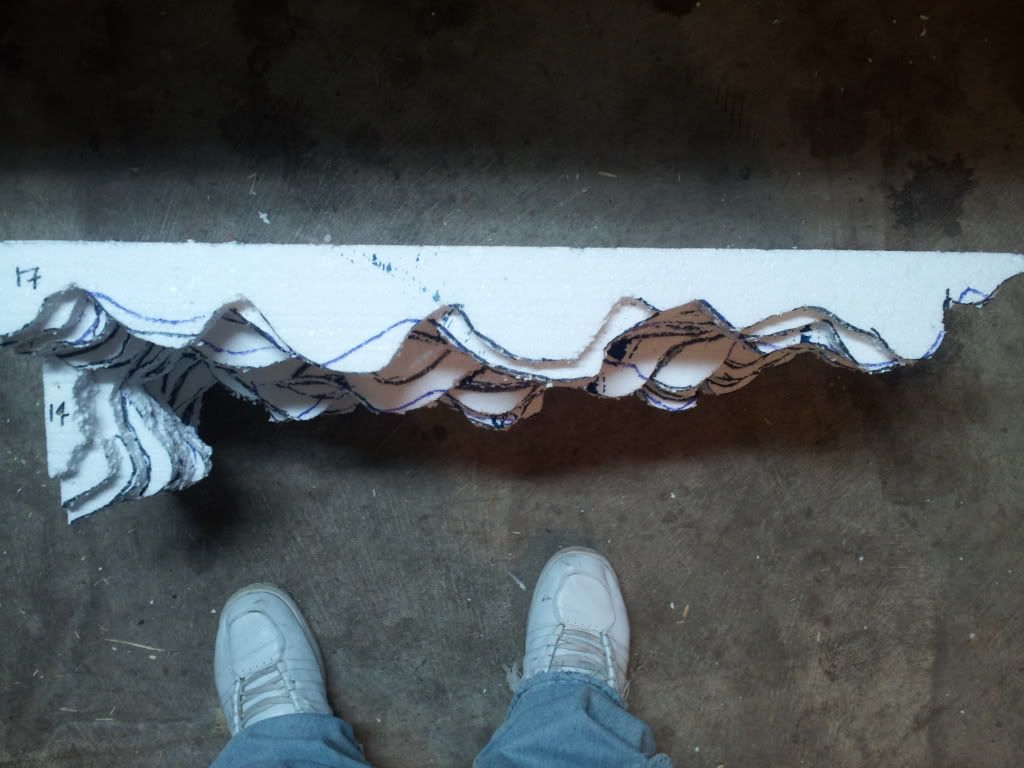
What i did was get my first piece cut out. Then i would trace that piece onto the next panel in purple sharpie and then alter it in black sharpie and then cut out the black sharpie line. Then trace the new piece onto the next panel in the same fashion. It takes me awhile to cut a piece because i have to picture it in my head first about 100 times. I would stack previous cut pieces up as they are cut so i could see how the build is progressing and then put the piece i'm working on in front of the finished pieces that are stacked up and start to alter the purple outline with my black sharpie. Helps me visualize where i'm going better.
couple pieces already cut out
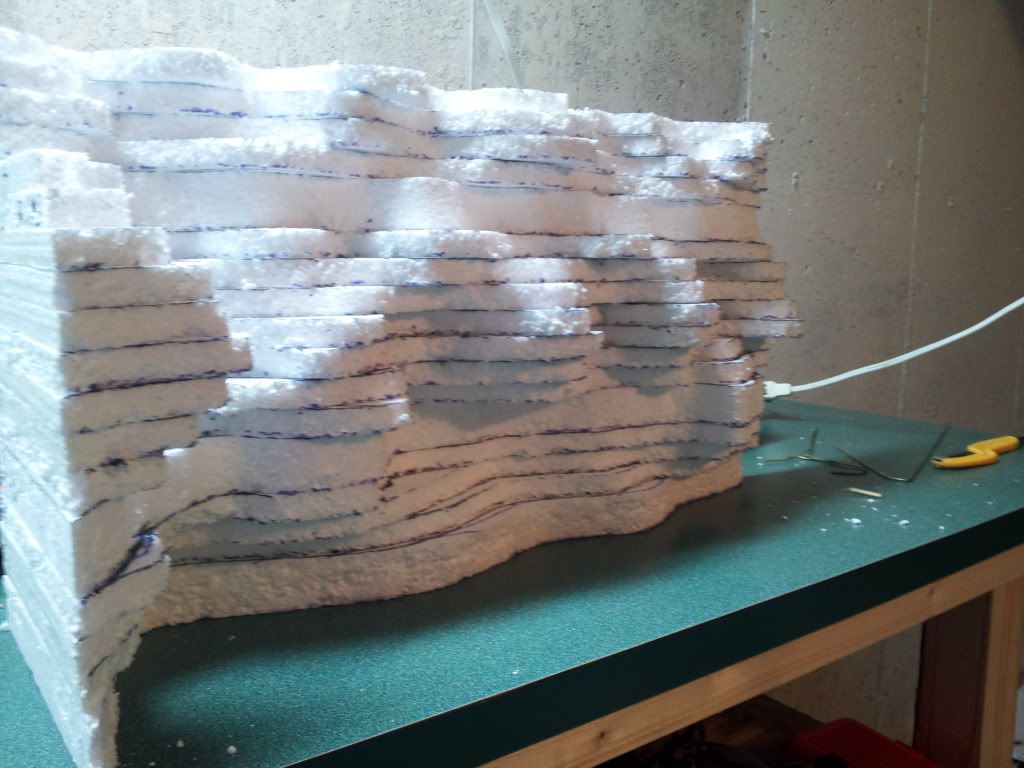
after a few more pieces
More pieces cut out
I'm trying to make a couple built in caves by overhanging pieces. One cave is in the back corner. I'll go in and chip away some of the styrofoam once its all siliconed together to make it deeper and more cave looking. The stack method is basically giving me a rough outline of the rock formations and ledges. I'll be going in with a sanding block and my fingers to define some areas more and get rid of the straight edges that happen from stacking.
Ok, my update break is over, back to the workshop to do some more. I'm trying to get all the panels done tonight so i can silicone tomorrow.
Stay tuned for more updates later
spent today finishing up the styrofoam and then started siliconing it all together. I ran out of silicone with 4 pieces left so in the picture the top 4 pieces are just sitting there for photo purpose. Have to finish up the siliconing tomorrow then figure out how i'm going to install my net pots into the background. Not sure if i'm going to try and carve out holes for the pots or get some great stuff and foam them to the background.
Anyone ever covered GS with grout? How well does it adhere to it? Hopefully i can get all the pots done tomorrow and let everything cure up for a bit and start grouting the background Tuesday.
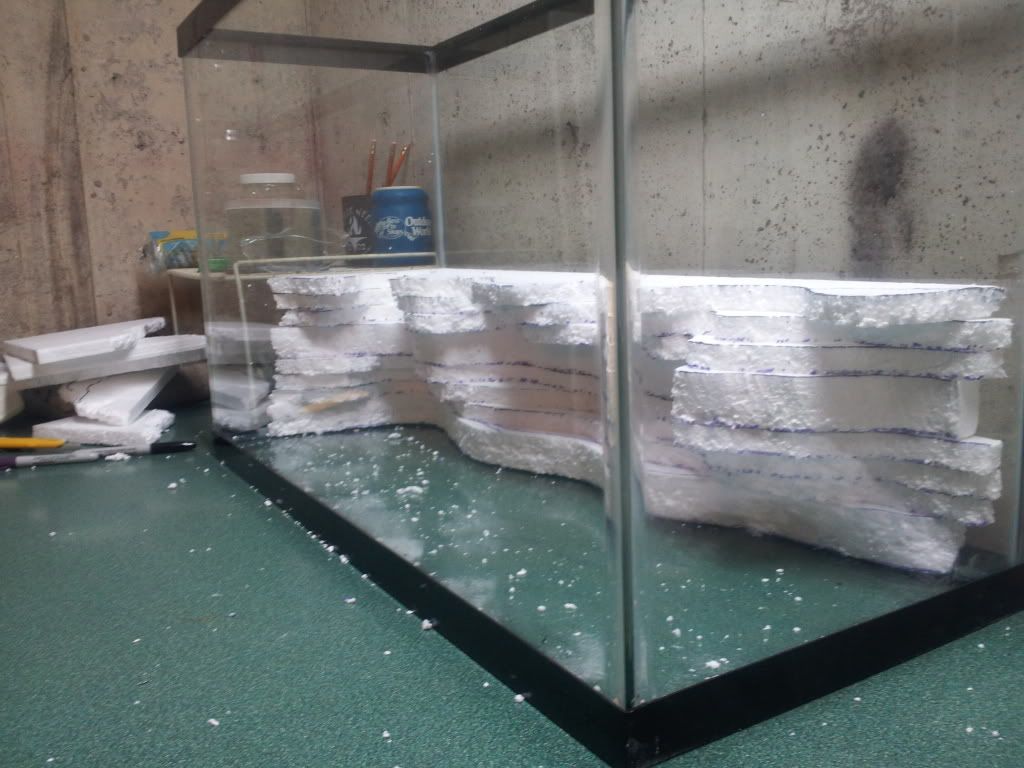
I'm going to have to trim down the back side as its just a hair too long to fit the whole background inside the tank as a whole unit which is going to leave a portion on the right side of the tank where the backwall has nothing on it so what I think i'm going to do is maybe paint the back of the tank black, or i'm going to get some of that black ground paper at the fish store and attach that to the back and left side of the tank, leaving the only viewable portions of the tank being from the front and right side, but you wont really be able to stand on the sides of the tank to look anyway because the tank is going inside a recessed portion of a wall (was a small closet in my office room and tank fits perfectly inside it.
That looks goodCan't wait to see this when it's done, good luck.
I'v'e actually just started doing the same thing for my (future) gecko.
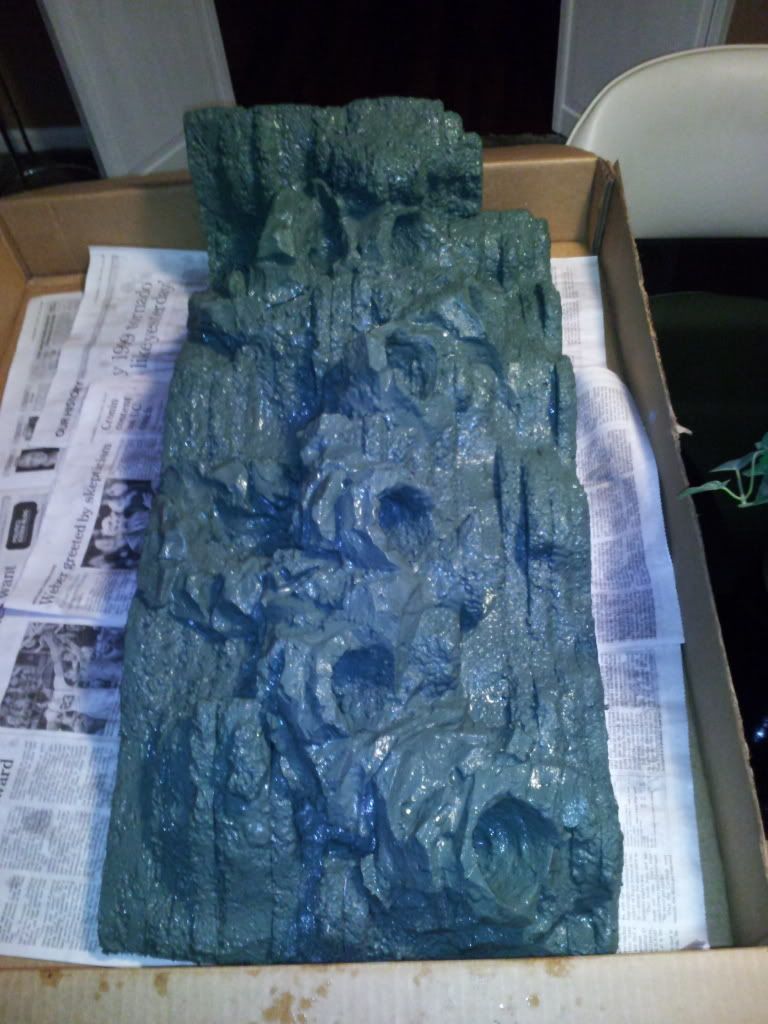
thanks, it looks rough right now but once i grout it and can start painting it to define the big rock portions that stick out it should look alot better. My plan is to stick moss on the ledges that stick out and see if i can get it to grow there. Going to have to bit the bullet on some Shields All sealer. Stuff cost like $25 a gallon which isn't bad but cost $20 to ship it which sucks. Wish i lived in Florida where the company was. I smeared silcone all over my rock wall for 10 gallon as a sealer and sprinkled sand on it but i'm not sure how well moss would grow ontop of silicone so i'm not sure if i'll final seal with silicone on this one or not, plus when your working with a big amount of silicone like you do when you cover something with it, it gets pretty fumey and is not fun to be around.
yeah It should look great
I'm just using pond sealer to seal mine, its not as thick as silicone and has a better texture (and it doesn't smell as bad)
pond sealer hmmm, got some more information on that? brand, etc.
Pond Sealer Clear: Waterproofing: Crommelin
I use this one, It's safe because its used in fish ponds ect,
i assume its clear right? Does it look shiny like silicone does when it dries? I may have to see if i can find some of that stuff
Yeah it's clear, but it comes in black, blue and sandstone also. Yeah it looks just like silicone
what's it cost?
I think mine was $20-$30
for a gallon i assume? that's about the same as Shields All. I'll probably go with some shields all to apply first since its more watery and can be sprayed on to get down in the nooks and crevices then maybe see if can find some kind of pond sealer stuff in a smaller quantity
For a litre
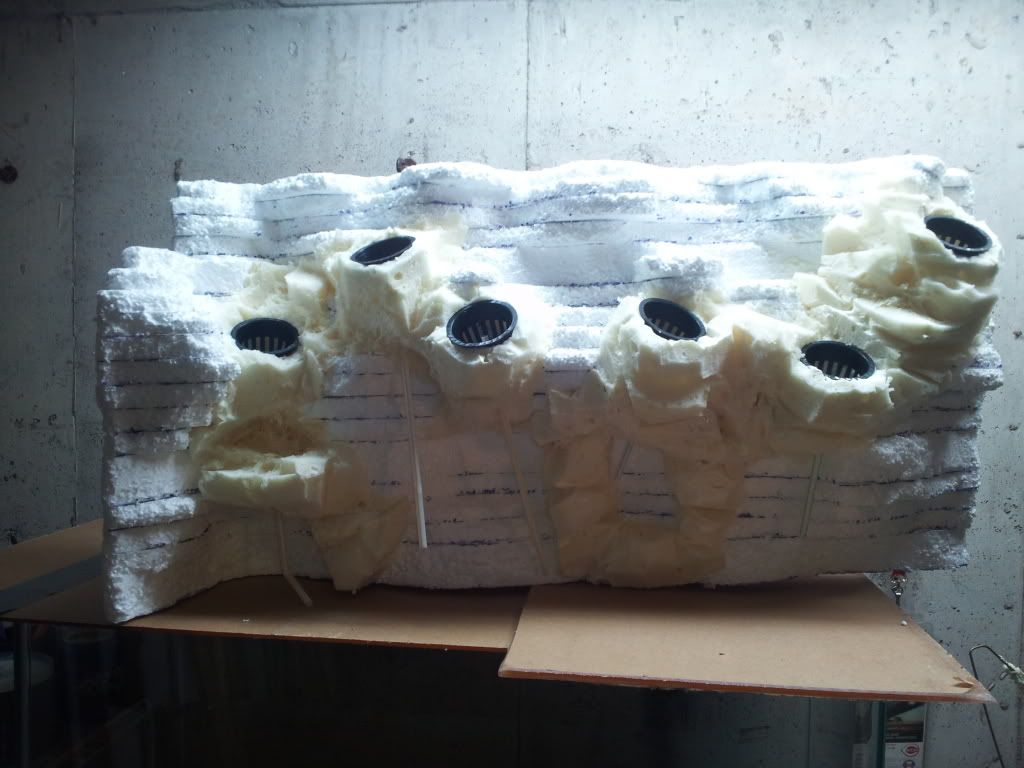
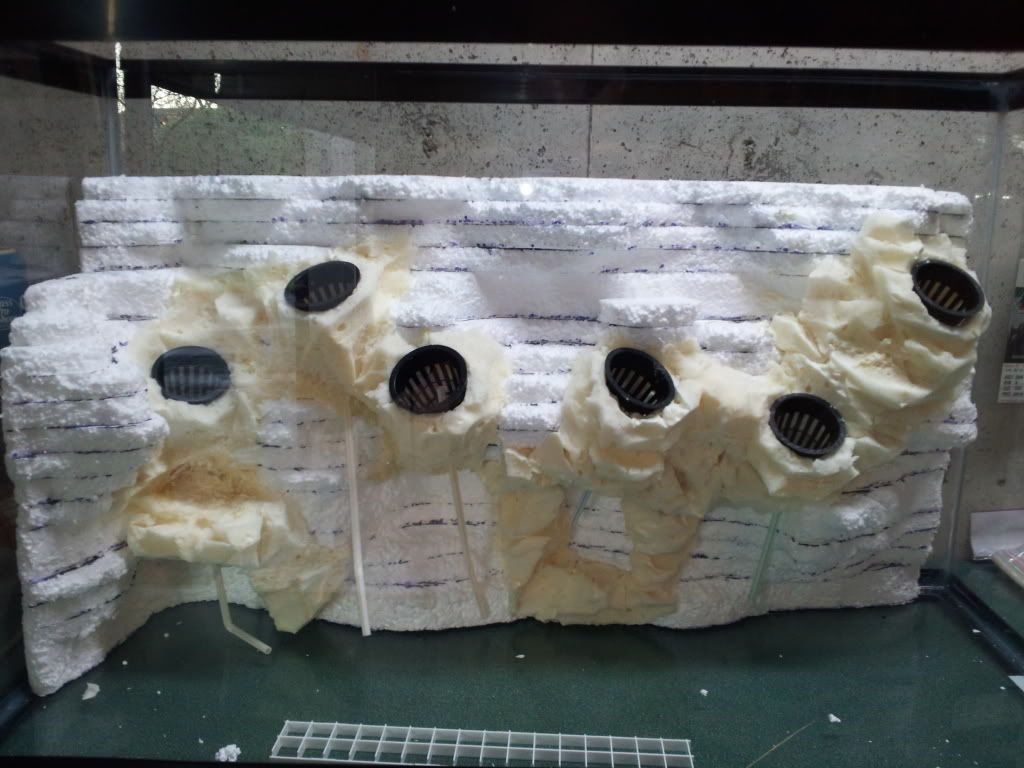
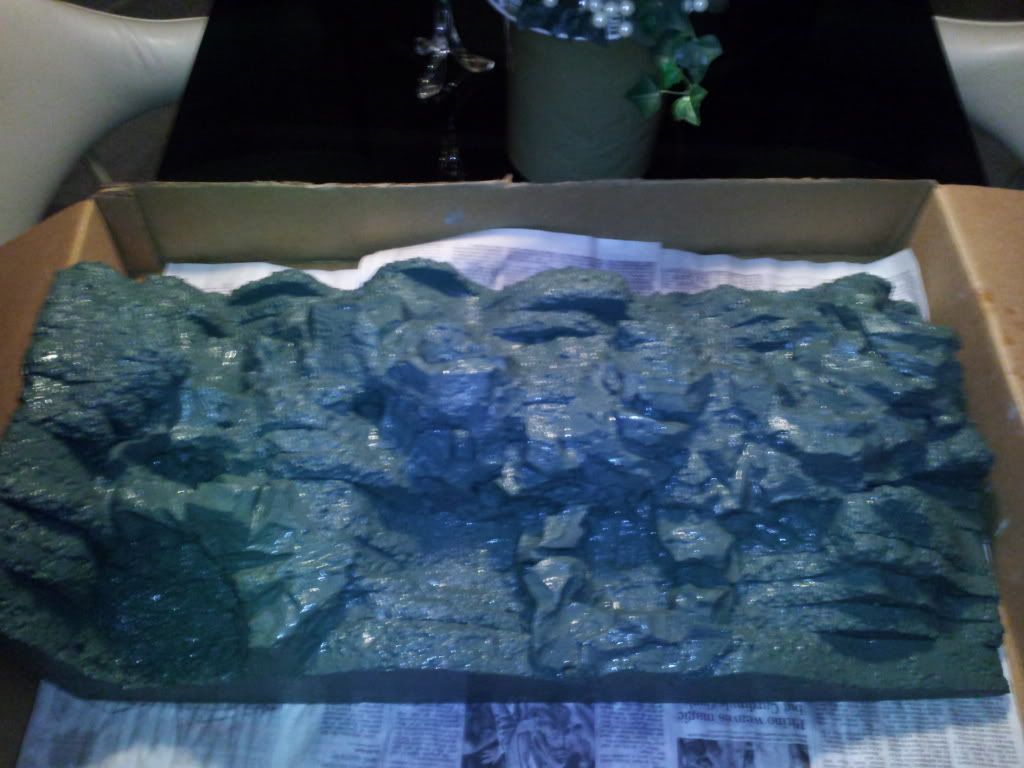
Today i finished up the silicone and then scraped way at the straight edges and defined some areas a little more with my finger nail. Also put the pots in place where i think i want them. Going to GS them in place i think, and once that cures and dries carve that some then we should be ready for grout phase
well picked up my darts today which got me motivated to work on the 29 gallon. Foamed the pots in and then cut away alot of it and did some mini sculpting. Need to do a couple more things then we should be ready for some coating. Not sure if i'm going to Silicone cocofiber this or grout and paint
worked on sanding the inside where the pots go a bit. My plan is to make it so there is some play in the holes for the pots to sit because i'm probably going to grout the inside of the holes as well. I may not even use the pots either since once grouted should make a nice spot to just throw some substrate in there and plant.
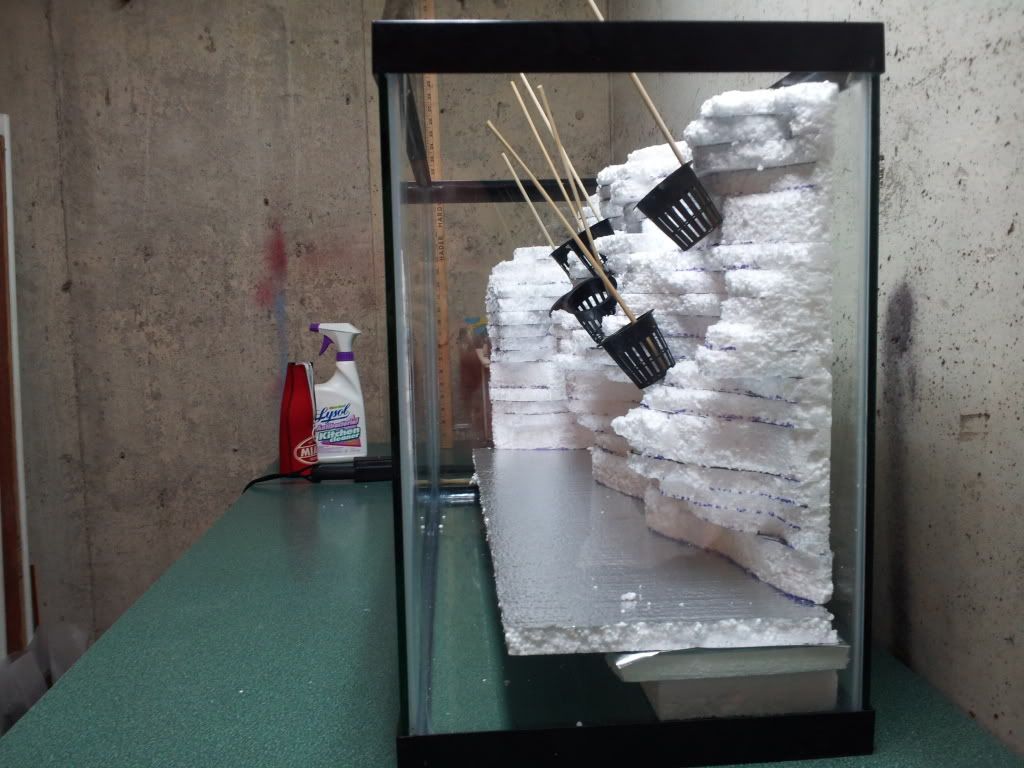
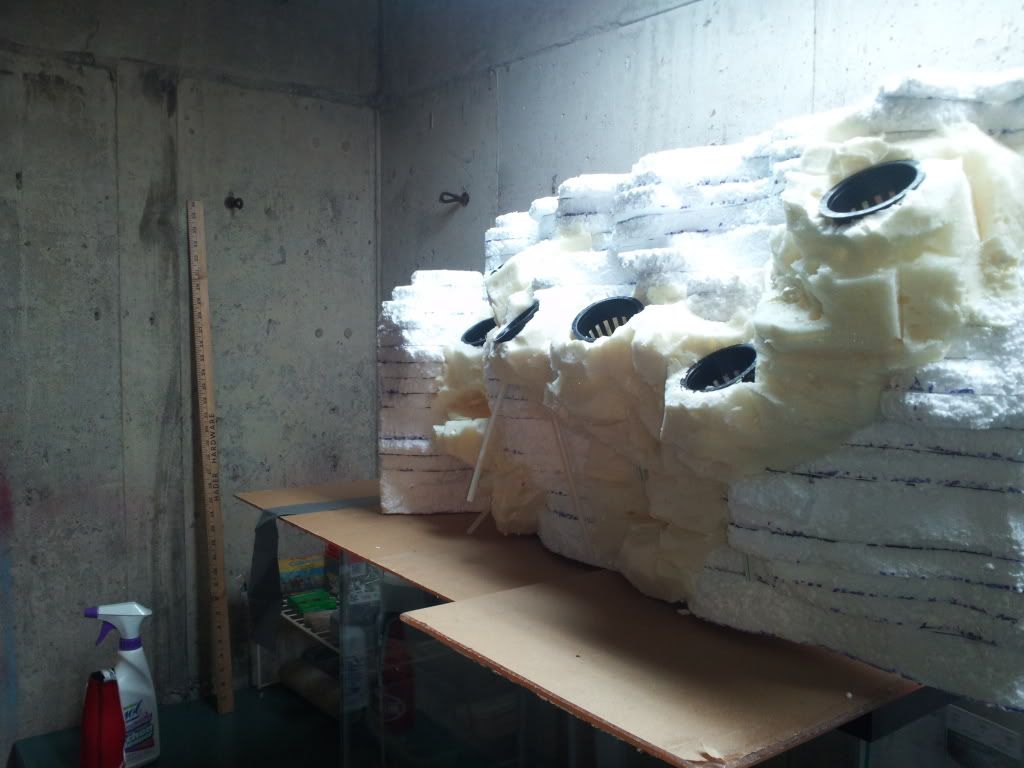
The straws you see sticking out are drain pipes for the planting areas. Once everything is grouted they will be cut down to size to where you wont be able to see them. Should a straw happen to get clogged for some reason i can stick a bbq skewer through it to unjam it. I may make a 2nd drain hole in each potting area as well.
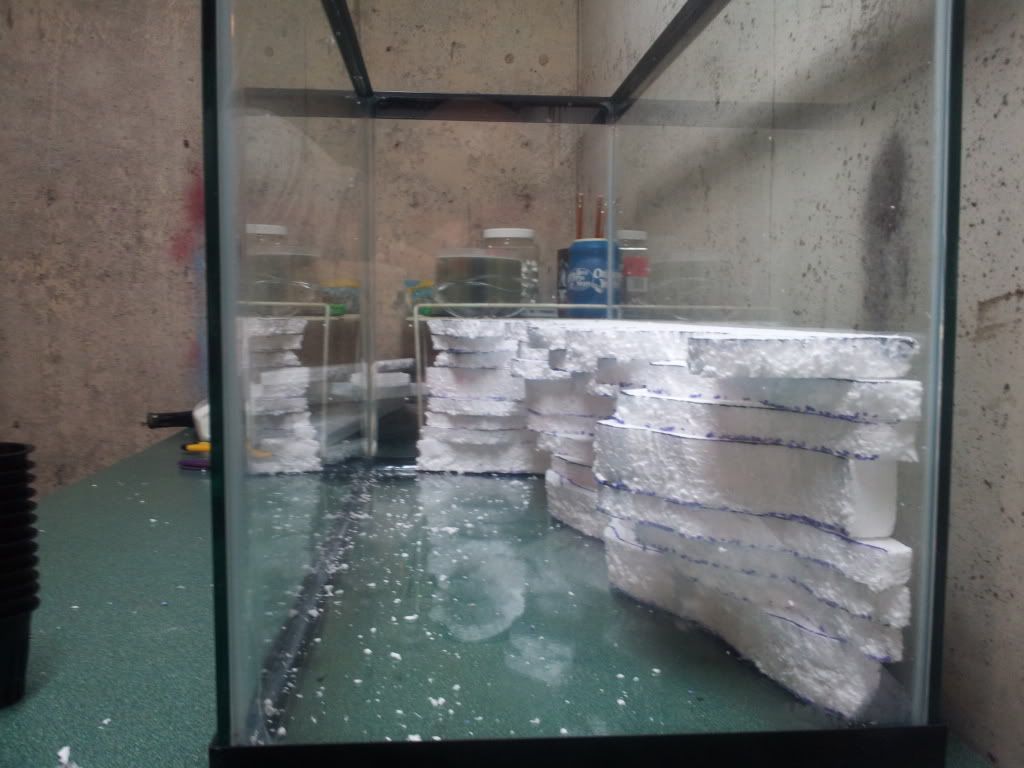
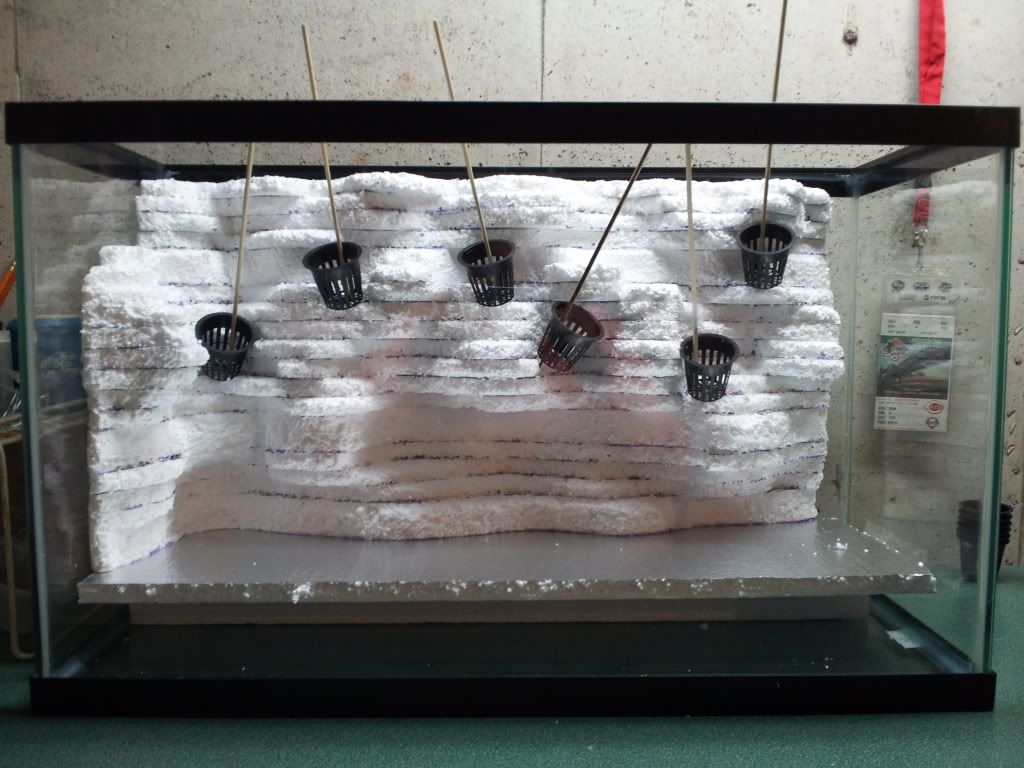
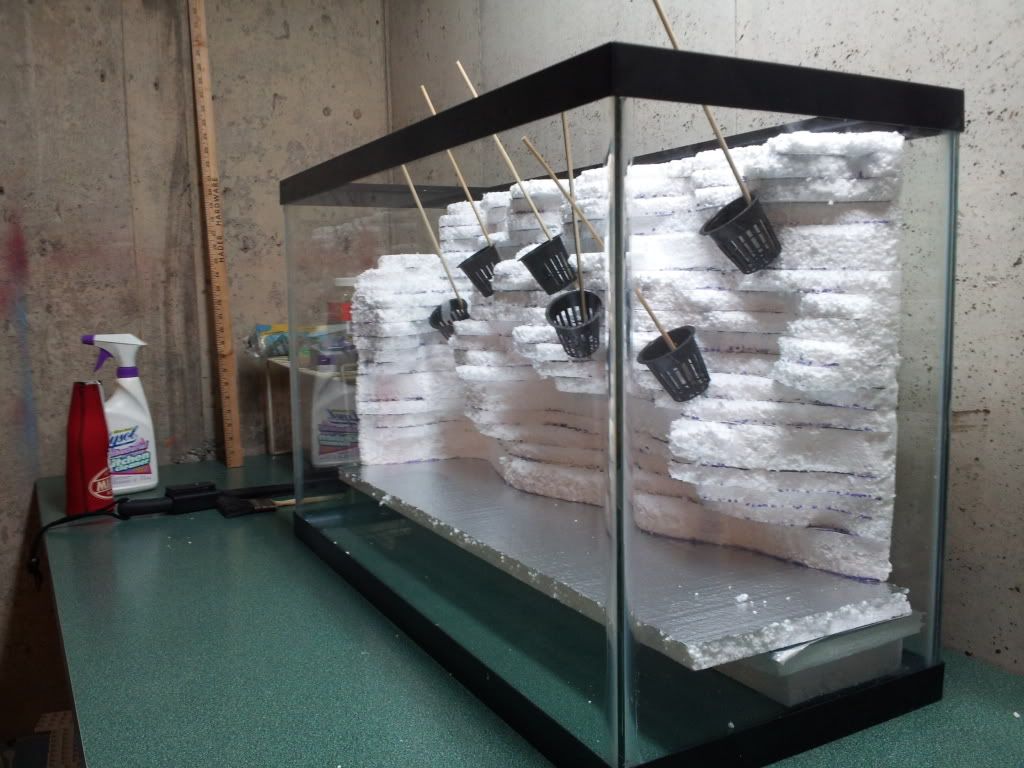
i just stuck the background in the tank to get a little visual. The final product will be up off the bottom of the tank to where the top of the background is flush with the inner rim of the tank.
My plans for the pots at this point from left to right are something along the lines of neo brom, some kind of viney plant probably a wandering jew, anther brom possibly a crypt, fern of some type, brom, and then pothos coming down the right side to cover the section on bare glass on the back wall.
as you can see there are alot of ledges on this background. I'm going to attempt to try and get some moss going on those ledges. My hopes are to have a majority of the background covered in moss
Probably going to have a small drainage pond in the front right corner for siphoning off excess water.
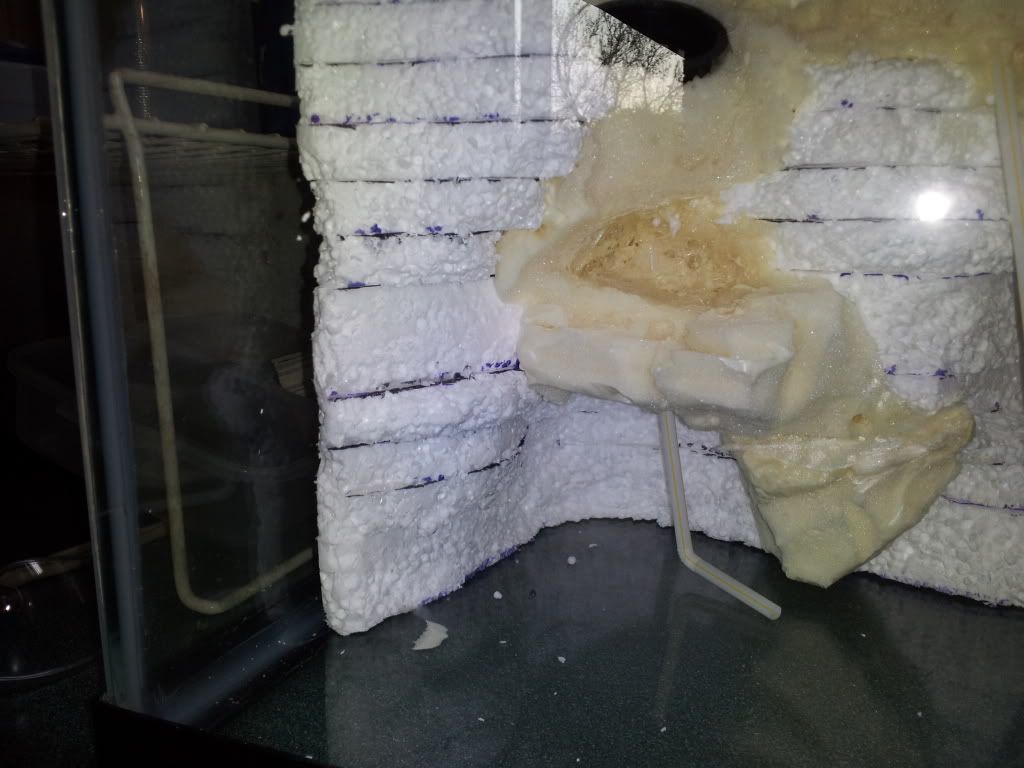
you can see the two caves in the back left corner, one big one at ground level, and then a smaller one above it.
closer look at the caves
Hopefully i'll start the grout process in the next couple of days
Looks great! Are those black things for plants?
yes they are 2" net pots
did some work today on the background. I decided that my drain holes with the straws in them were too small to allow me to get some grout over the foam in there so i took the straws out and will leave them out. I took a grinding stone attachment and put it on a drill and bored out the holes alot bigger for adequate drainage from the pots and to allow me to coat the foam with grout. Also took the grinding stone to the pot areas and made them slightly bigger to allow a couple layers of grout in there and then for the pots to be able to still fit. Using pots would allow easy removal of the plants, but i may not use the pots and just plant directly in the spots, i'll decide when it comes time for that.
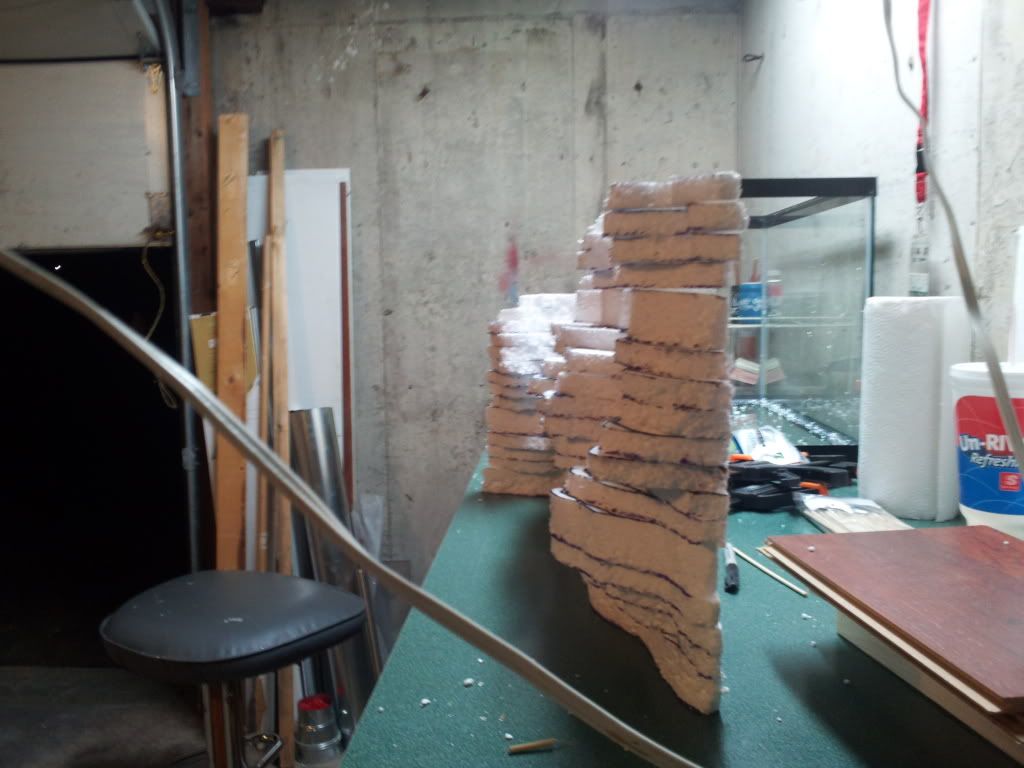
put a layer of grout on today to the front top bottom and sides. Tomorrow i'll do the back and give the front another day to cure up good and then start the 2nd coat on the front thursday. I had to make the first layer pretty runny to allow me to get into all the cracks and crevices. 2nd coat will be runny as well to get into the cracks again. I found it easier to just pour the grout in the hard to reach spots with a spoon and then dab it around with my brush instead of trying to get in there first with just a brush. The pics are of the background laying on its back drying so it looks a little different than what you'll see when its in the tank but you can at least see how the grout applied.
There are currently 1 users browsing this thread. (0 members and 1 guests)
 Posting Permissions


 Reply With Quote