Page 1 of 3 123 LastLast
Results 1 to 20 of 95

Thread: 29 gallon build log

Hybrid View

Previous Post Previous Post   Next Post Next Post
  1. #1
    J Teezy
    Guest

    Default 29 gallon build log

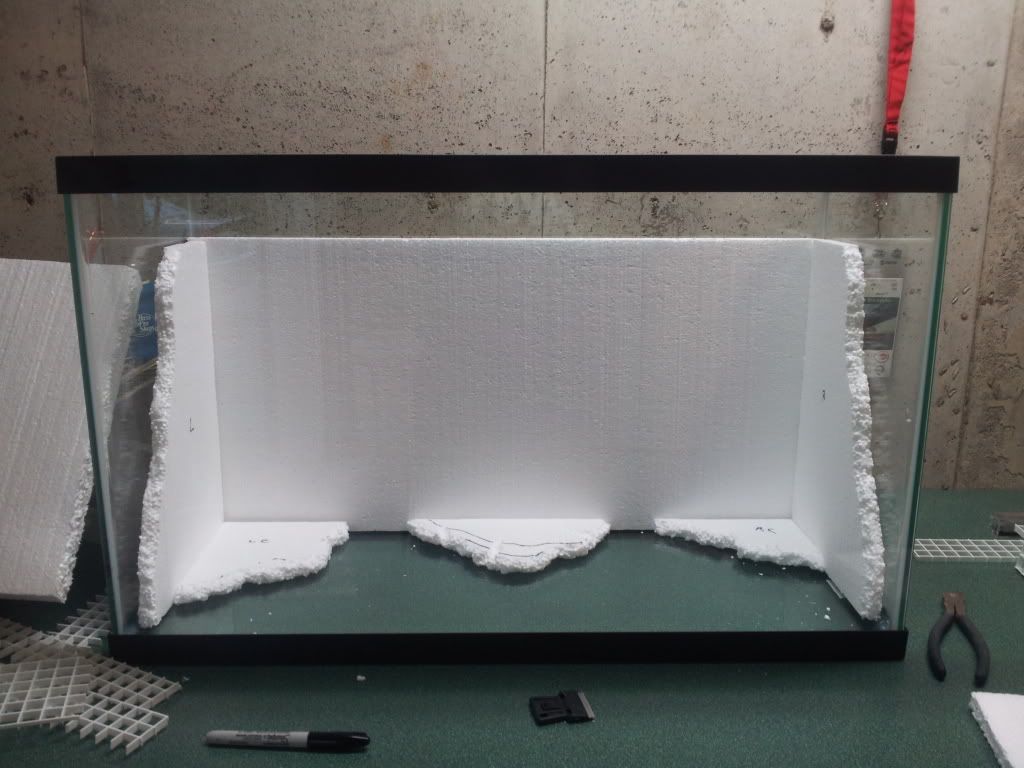
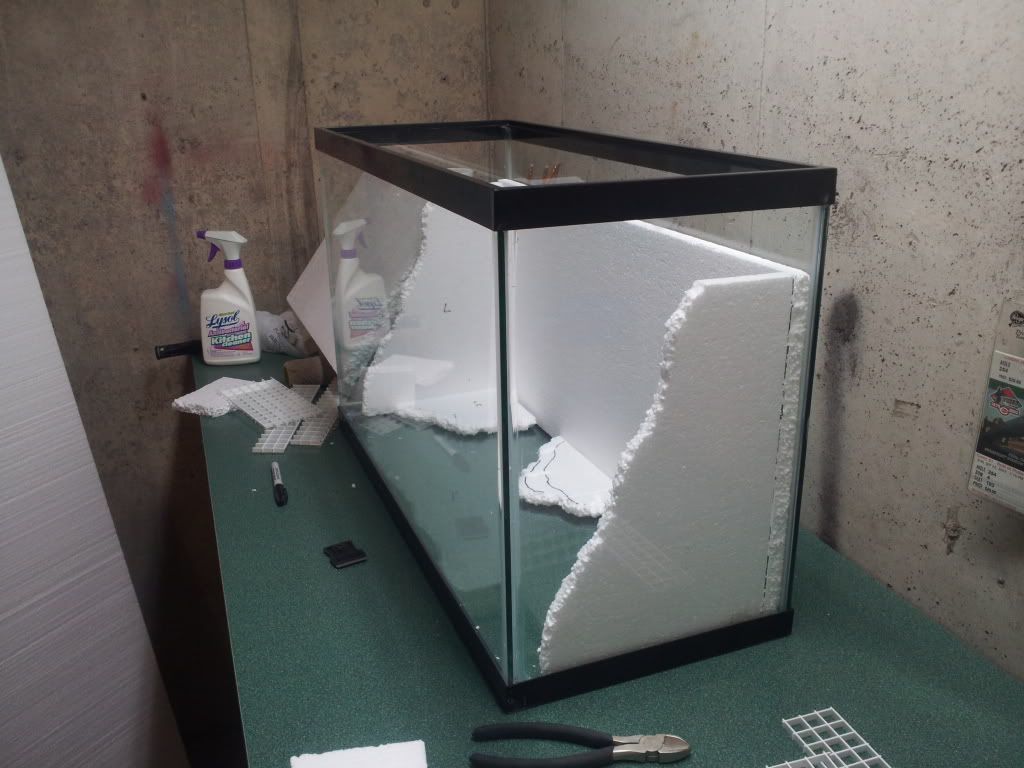
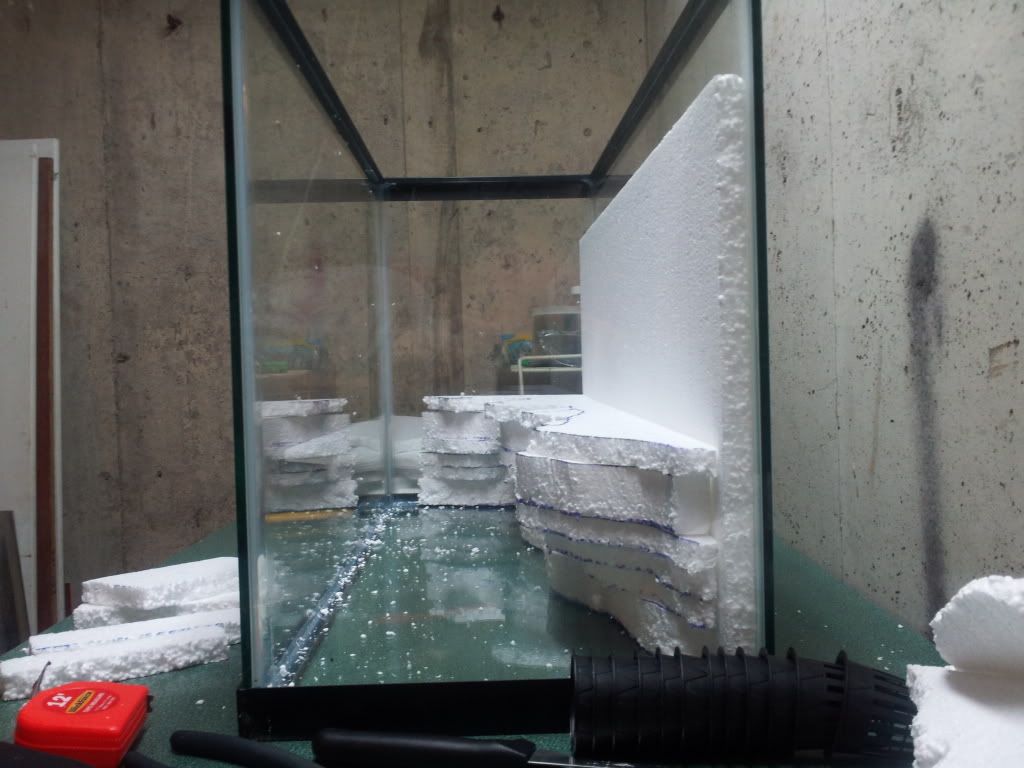
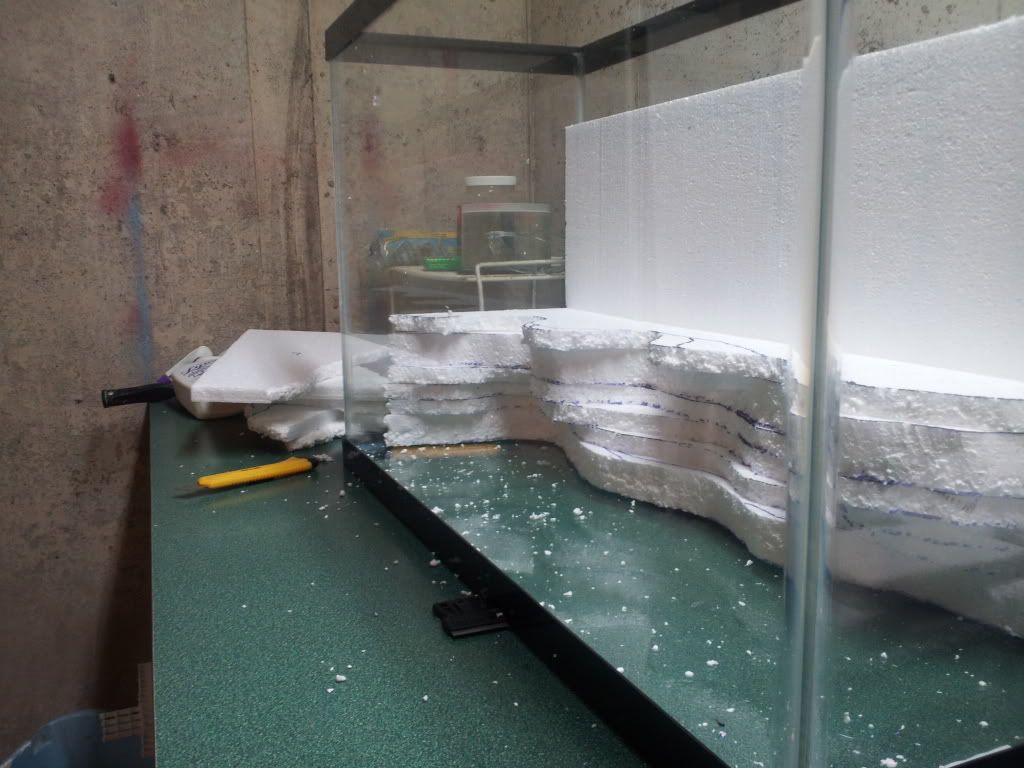
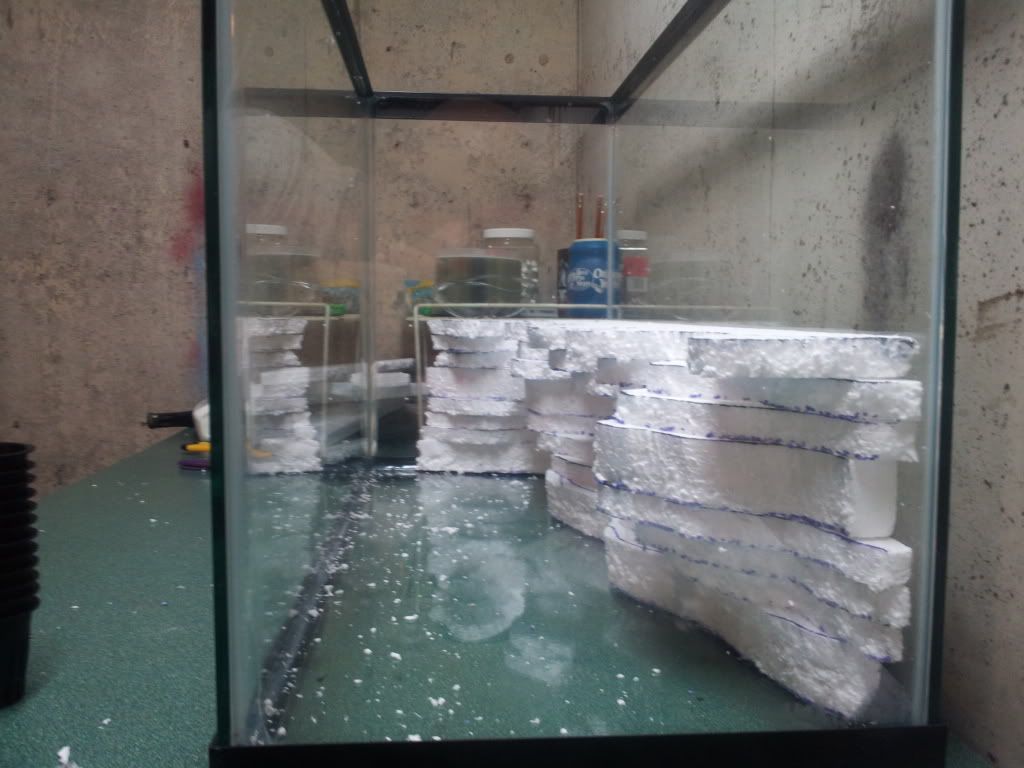
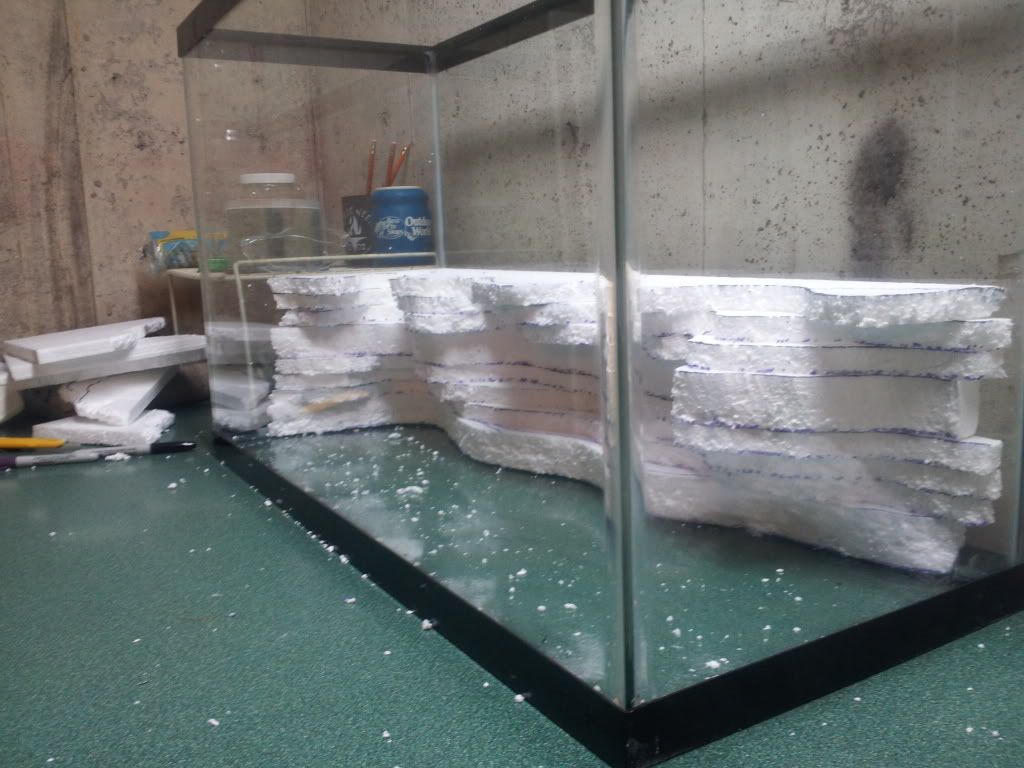
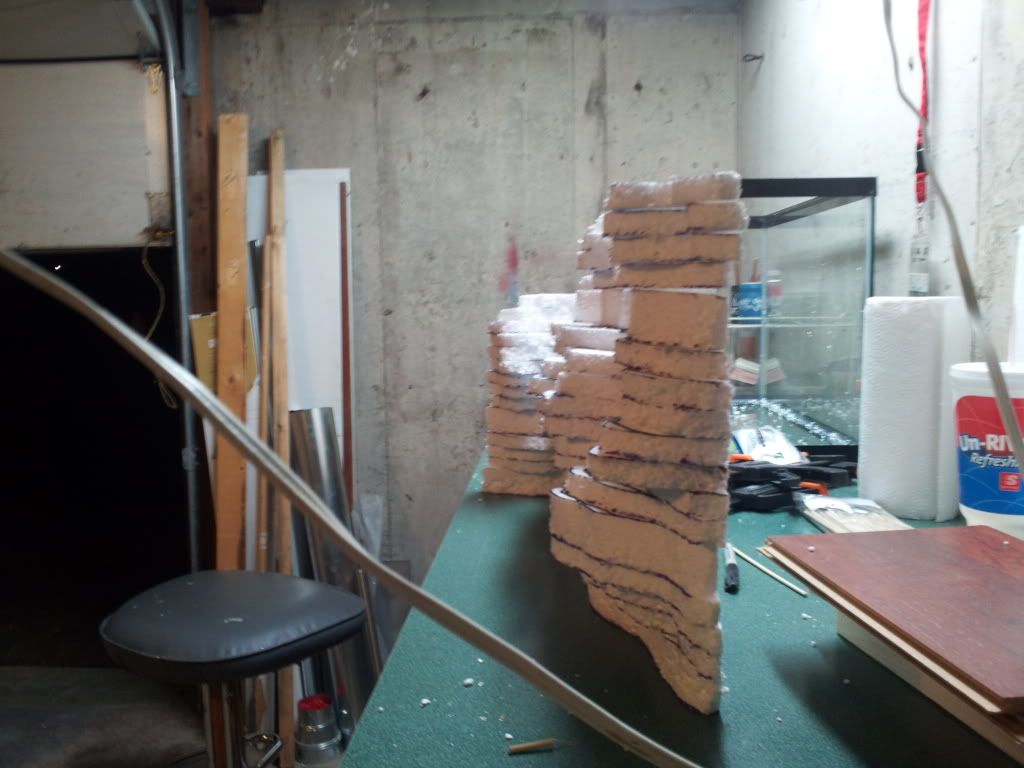
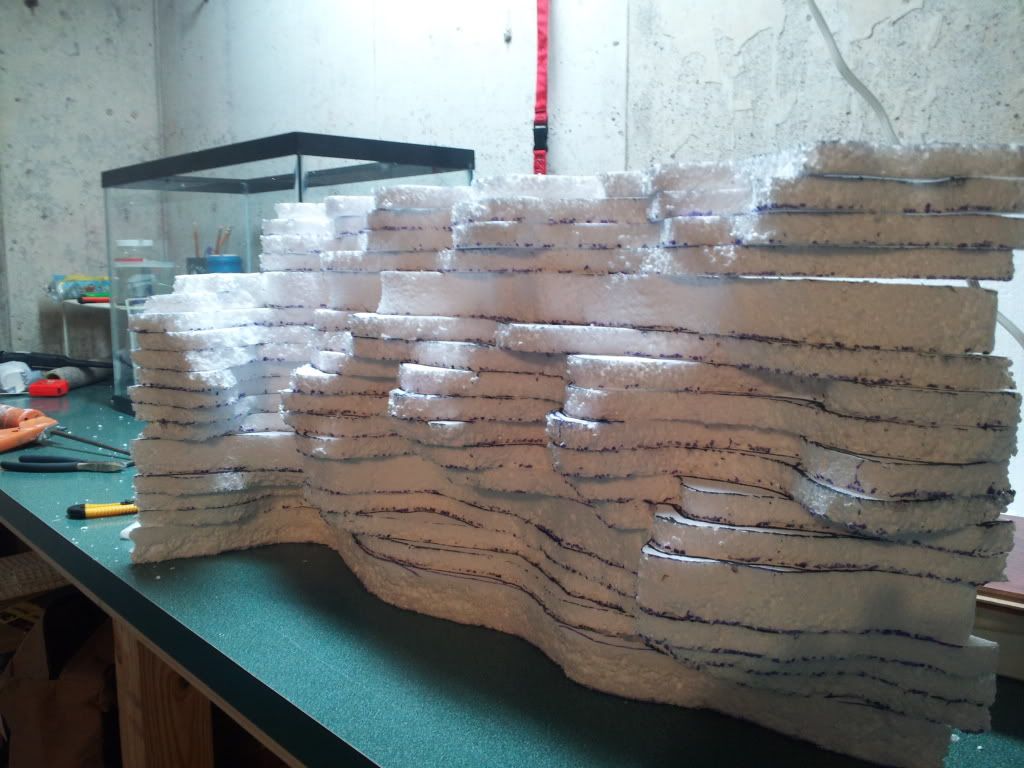
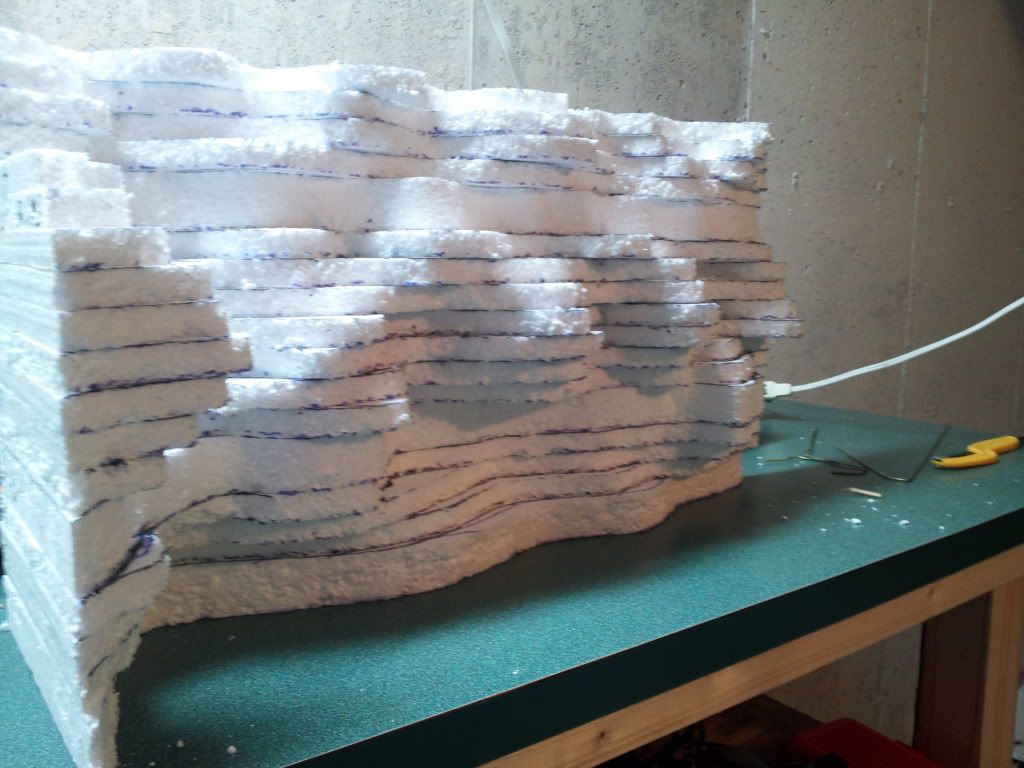
    Well, I picked up used 29 gallon tank that is practically new. Started messing around with some ideas today

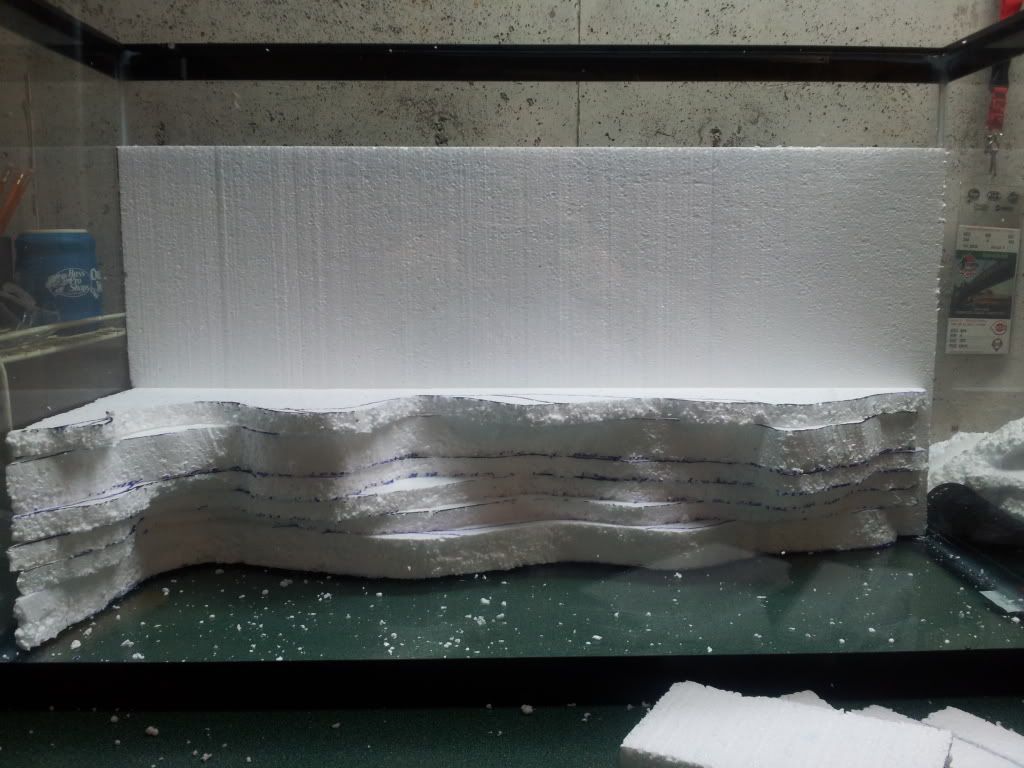
    The styrofoam background will be pushed to the top of the tank when its complete it's just sitting at the bottom so that i could picture what i was doing


    I'm contemplating a water feature for this build but can't really decide if I want to or not. The thing that's messing with my decision is that if I did a water feature i'd want to drill the tank, and though I had no issues drilling my 10 gallon, I don't know if i want to take the chance on this one because drilling glass is not fail safe and also don't really have any idea of what kind of pump i should get if I did decide to do the water feature. I really wanted to experiment with a water fall, but i kind of what to keep this simple as well

  2. #2
    J Teezy
    Guest

    Default Re: 29 gallon build log

    Friday night and some cold beer and a trip to home depot and i started to put this in action. I scraped my original idea and went with a stack method I saw on youtube. I bought a 4' x 8' by 3/4" thick styrofoam insulation. This stuff had a plastic sleeve on one side and a foil sheet on the other. Kind of pain to remove but not too bad. What I did was make myself a 29" x 9" rectangle out of cardboard as a template to cut out a bunch of panels. After i had all the panels cut out I started working my design

    What i did was get my first piece cut out. Then i would trace that piece onto the next panel in purple sharpie and then alter it in black sharpie and then cut out the black sharpie line. Then trace the new piece onto the next panel in the same fashion. It takes me awhile to cut a piece because i have to picture it in my head first about 100 times. I would stack previous cut pieces up as they are cut so i could see how the build is progressing and then put the piece i'm working on in front of the finished pieces that are stacked up and start to alter the purple outline with my black sharpie. Helps me visualize where i'm going better.

    couple pieces already cut out


    after a few more pieces


    More pieces cut out


    I'm trying to make a couple built in caves by overhanging pieces. One cave is in the back corner. I'll go in and chip away some of the styrofoam once its all siliconed together to make it deeper and more cave looking. The stack method is basically giving me a rough outline of the rock formations and ledges. I'll be going in with a sanding block and my fingers to define some areas more and get rid of the straight edges that happen from stacking.

    Ok, my update break is over, back to the workshop to do some more. I'm trying to get all the panels done tonight so i can silicone tomorrow.

    Stay tuned for more updates later

  3. #3
    J Teezy
    Guest

    Default Re: 29 gallon build log

    spent today finishing up the styrofoam and then started siliconing it all together. I ran out of silicone with 4 pieces left so in the picture the top 4 pieces are just sitting there for photo purpose. Have to finish up the siliconing tomorrow then figure out how i'm going to install my net pots into the background. Not sure if i'm going to try and carve out holes for the pots or get some great stuff and foam them to the background.

    Anyone ever covered GS with grout? How well does it adhere to it? Hopefully i can get all the pots done tomorrow and let everything cure up for a bit and start grouting the background Tuesday.


    I'm going to have to trim down the back side as its just a hair too long to fit the whole background inside the tank as a whole unit which is going to leave a portion on the right side of the tank where the backwall has nothing on it so what I think i'm going to do is maybe paint the back of the tank black, or i'm going to get some of that black ground paper at the fish store and attach that to the back and left side of the tank, leaving the only viewable portions of the tank being from the front and right side, but you wont really be able to stand on the sides of the tank to look anyway because the tank is going inside a recessed portion of a wall (was a small closet in my office room and tank fits perfectly inside it.

  4. #4
    Kristen
    Guest

    Default Re: 29 gallon build log

    That looks good Can't wait to see this when it's done, good luck.
    I'v'e actually just started doing the same thing for my (future) gecko.

  5. #5
    J Teezy
    Guest

    Default Re: 29 gallon build log

    thanks, it looks rough right now but once i grout it and can start painting it to define the big rock portions that stick out it should look alot better. My plan is to stick moss on the ledges that stick out and see if i can get it to grow there. Going to have to bit the bullet on some Shields All sealer. Stuff cost like $25 a gallon which isn't bad but cost $20 to ship it which sucks. Wish i lived in Florida where the company was. I smeared silcone all over my rock wall for 10 gallon as a sealer and sprinkled sand on it but i'm not sure how well moss would grow ontop of silicone so i'm not sure if i'll final seal with silicone on this one or not, plus when your working with a big amount of silicone like you do when you cover something with it, it gets pretty fumey and is not fun to be around.

  6. #6
    Kristen
    Guest

    Default Re: 29 gallon build log

    yeah It should look great Too bad about that sealer though,
    I'm just using pond sealer to seal mine, its not as thick as silicone and has a better texture (and it doesn't smell as bad)

  7. #7
    Wolfie64
    Guest

    Default Re: 29 gallon build log

    This looks so cool. I am working on a project like this but made it more complicated for myself by adding a water feature which is taking some serious thought to work out. Can't wait to see the grout layer.

  8. #8
    maxQ
    Guest

    Default Re: 29 gallon build log

    Josh, I have absolutely loved this build. I have read and re-read every word and looked at your pictures until I almost went blind. Awesome job ! I have a 18x18x18 sitting on my work bench waiting to get started, I will be using your build to go by and for pointers, I love how yours came out. My issue is, I have so many other questions that I have so expect me to hit you up. : ) For instance, how are you routing water lines to your pots if you plan to do that, which I do. GREAT JOB and Thanks for posting this.

  9. #9
    AReaHerps
    Guest

    Default

    This looks really awesome! Great creativity and your babies are going to LOVE it! Quick question. What brand and type of grout did you use? I would very much like to try a background with grout. I love how realistic it appears. Also, I was chatting with a painter and he said that high quality acrylic paint for say bathrooms (behr's) is waterproof after drying and putting on 2 or more coats. Has anyone else tried using a background with only acrylic paint to seal it? I like the idea of grout then just painting several layers of paint. Seems logical to me.

    Sent from my Android using the Tapatalk Forum App! It's awesome!

  10. #10
    J Teezy
    Guest

    Default Re: 29 gallon build log

    the grout is just unsanded grout from home depot, whatever brand they carry think its called Polyblend. As far as that bathroom paint, the question is if its non toxic? If it's made for a bathroom i wouldnt be surprised if it has some kind of mold and mildew blockers in it. I use non toxic acrylic craft paint and the Shields All which is a non toxic acrylic sealer. Shields All is not waterproof but is water resistant so stuff that's going to be under water 24/7 365 you'd want to seal in silicone or pond sealer or something along those lines

  11. #11
    AReaHerps
    Guest

    Default

    I was reading in another forum that as long as the paint is 100% acrylic then it's non toxic. Is that true in your opinion? I'll have to do more research about the mold/mildew blockers. What about it makes it toxic in builds?

    Sent from my Android using the Tapatalk Forum App! It's awesome!

  12. #12
    HerpDerp
    Guest

    Default Re: 29 gallon build log

    Wow this is awesome! I really want to do something like this with my terrarium at some point. I really think that this thread should be a sticky so that everyone can learn from this!

  13. #13
    J Teezy
    Guest

    Default Re: 29 gallon build log

    Today i made up some thick grout to do some work on the edges where the pots are. I didn't paint that part because i need to sand it a little and add a little bit more in some spots. Then went ahead and did a base coat of black. I like to base coat with black so that i can get down in the cracks and crevices real good so that when i start detailing rocks more the black in the cracks gives an illusion that the rocks go back further than they really do. This is just a single coat of black that i hand painted with a small brush to make sure i got down in all the cracks. I'll most likely mix up some more in a dollar store spray bottle watered down some and spray over the whole thing in black one more time before i start using the grey tones for the rock


    taking the picture also helps me to see spots i missed so that i can go back and fill in

  14. #14
    J Teezy
    Guest

    Default Re: 29 gallon build log

    think we are just about ready to start with the grey tones


  15. #15
    J Teezy
    Guest

    Default Re: 29 gallon build log

    ok well its done, it's just drying at the moment so i can't get the final pictures until i can stand it up.

    So this is how i do my backgrounds

    1st black was applied, i did several coats to try and cover every tiny spot of grout i could see

    2nd i sponged on a dark grey color. These two pictures are how it looks after the grey. This is why i like to base coat in black, i think it really makes the grey show up. The pictures don't do it justice, you need to see it under 6500k lights to really see how the paint pops on this


    Now this is not how it looks finished. The last thing i did was used a light grey to dry brush over the rocks. Really brings out detail and brings the rocks to life. You'll have to wait a few more minutes until its dry enough for me to stand it up and snap some pics

  16. #16
    AReaHerps
    Guest

    Default

    That sucks man. So sorry. I think it will look great after you fix it. Don't toss it though! Keep your head up. Fantastic looking background either way!

    Sent from my Android Tapatalk App!

  17. #17
    J Teezy
    Guest

    Default Re: 29 gallon build log

    messed around with the brush and some paints and was able to fix the areas. The cracks actually make the rocks look even more realisitic now, but my fear is that this is going to keep cracking. I'm going to leave it alone for a day or so to see what happens to the cracks.

  18. #18
    bigwilliestyles
    Guest

    Default Re: 29 gallon build log

    Quote Originally Posted by J Teezy View Post
    messed around with the brush and some paints and was able to fix the areas. The cracks actually make the rocks look even more realisitic now, but my fear is that this is going to keep cracking. I'm going to leave it alone for a day or so to see what happens to the cracks.
    I was thinking that those cracks just make it look more authentic. It seems a bit weird that it cracked? Perhaps it had something to do with the grout drawing moisture from the foam? My foam backgrounds with peatmoss havent had an issue with cracking. Although they do shrink a bit with time.

    I am looking forward to seeing this all planted.

  19. #19
    NatureLady
    Guest

    Default Re: 29 gallon build log

    Oh man. I was just able to load this thread and sorry about the cracks!!!
    It looks really amazing though and I hope that it has decided to stop cracking!

  20. #20
    J Teezy
    Guest

    Default Re: 29 gallon build log

    Quote Originally Posted by bigwilliestyles View Post
    I was thinking that those cracks just make it look more authentic. It seems a bit weird that it cracked? Perhaps it had something to do with the grout drawing moisture from the foam? My foam backgrounds with peatmoss havent had an issue with cracking. Although they do shrink a bit with time.

    I am looking forward to seeing this all planted.
    It wasn't the grout that cracked. The foam expanded somehow and cracked the grout, Can tell it was the foam because of how spread the cracks were. I fixed it for now hopefully. I'm just waiting on this guy to get back to me about drilling my drain so i can move on with the build, he's holding me up at the moment

Page 1 of 3 123 LastLast

Thread Information

Users Browsing this Thread

There are currently 1 users browsing this thread. (0 members and 1 guests)

Similar Threads

  1. 55 Gallon Vivarium Build
    By MikeM670 in forum Vivarium, Terrarium & Enclosure Discussion
    Replies: 21
    Last Post: July 24th, 2013, 05:44 PM
  2. 20 Gallon Vivarium Build
    By killerecho in forum Vivarium, Terrarium & Enclosure Discussion
    Replies: 11
    Last Post: November 19th, 2012, 07:49 AM
  3. My first 55 Gallon Build...
    By Ren in forum Vivarium, Terrarium & Enclosure Discussion
    Replies: 19
    Last Post: August 21st, 2011, 10:39 PM
  4. 131 Gallon Viv Build
    By Kisa in forum Vivarium, Terrarium & Enclosure Discussion
    Replies: 37
    Last Post: August 13th, 2011, 03:17 PM
  5. 55 Gallon Build- Pic Heavy
    By rcteem in forum Vivarium, Terrarium & Enclosure Discussion
    Replies: 6
    Last Post: December 18th, 2010, 09:43 AM

Tags for this Thread

Posting Permissions

  • You may not post new threads
  • You may not post replies
  • You may not post attachments
  • You may not edit your posts
  •