THE BASICS OF "THE FALSE BOTTOM":
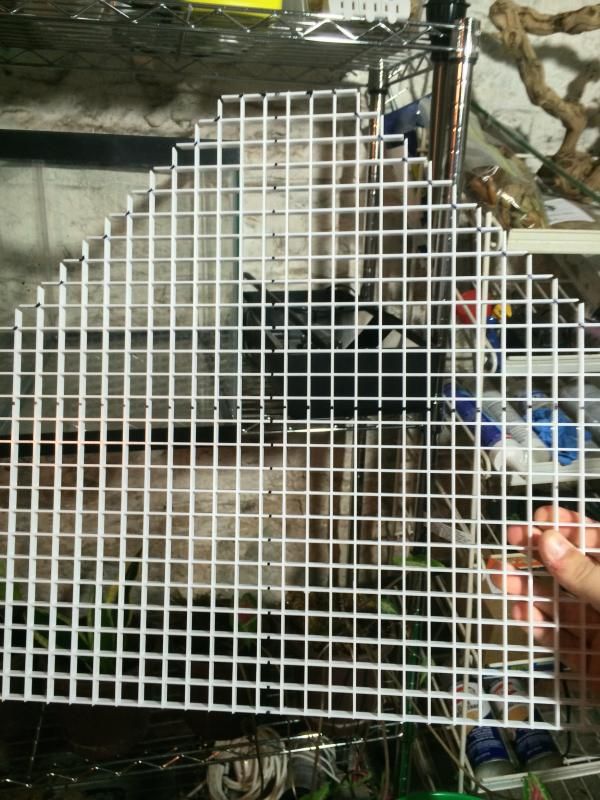
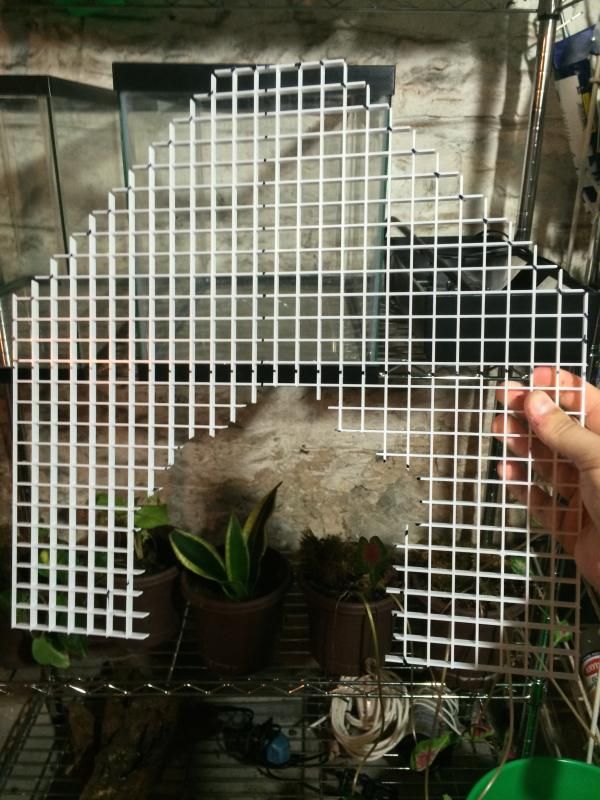
The false bottom is the one that scares people the most, but it is surprisingly easy. they are very inexpensive to build. All you need is some PVC pipe, and some eggcrate (sold as lighting diffuser). it looks like the white grid in this pic:
your first step in this process is going to be determining the height of the false bottom. now, there are a few factors which determine this, but the main one is what your finished water level is going to be. to avoid wicking water up into the substrate, i recommend having the water level 1 inch below the bottom of the false bottom. example: you want a 4" water level, then you would cut your supports at 5". this will keep your soil mix moist, but not soaking wet, causing bog conditions.
i do want to mention though, that a bog section of tank is not always a bad thing. quite a lot of our amphibious friends live in boggy conditions. and quite a few beautiful plants grow there as well. it also gives us the opportunity to incorporate some plants that are normally seen as aquatic into the build as a marginal, or emersed plant. this is where research plays a huge role. not all aquatics will live as marginals, so you must do your research diligently here.
now, i would like to take a moment to discuss the supports. i have seen many a tank built with the wrong size diameter supports. 1/2" and 1" just will not cut it, unless you plan on putting about 50 in lol i use a minimum of 2" pvc pipe as supports. home depot sells 2' lengths of this for about $2, so you don't need to buy an 8' length if you don't have the room to transport it. now if you you are using pvc for your supports, you need to remember something. the water you are misting with or the fog that comes from your fogger, is going to get into these supports as it drains through the soil and can become stagnated. this means you need to provide and exit for the water inside the supports. this can be done in numerous ways. drilling the pvc supports with holes is the most common and easiest way to do this, as you can see in this pic:
i like that picture because it also shows just how many supports i use. for reference, that is a 36x18 tank and there are a LOT of supports in there. then consider that i also keep an aquarium heater and a submersible filter in that area. it takes some creativity to fit everything in, but take your time and plan ahead and you'll be fine.
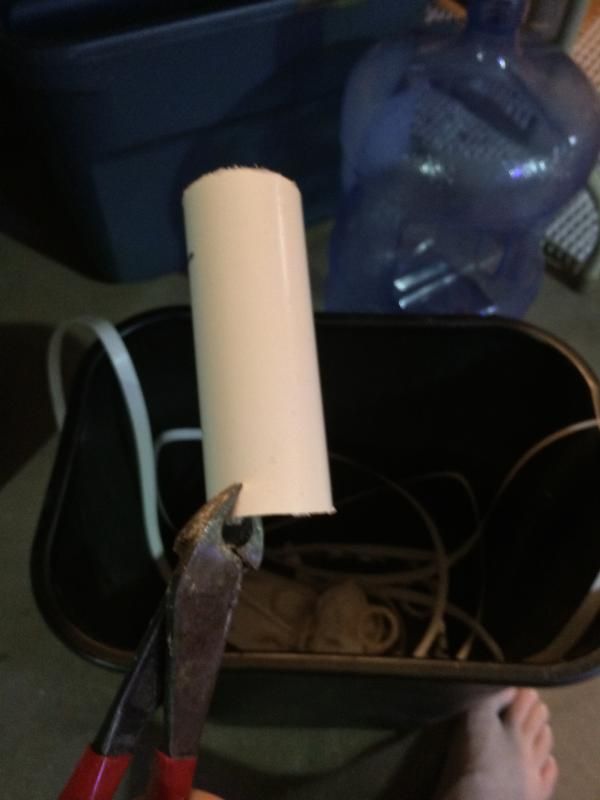
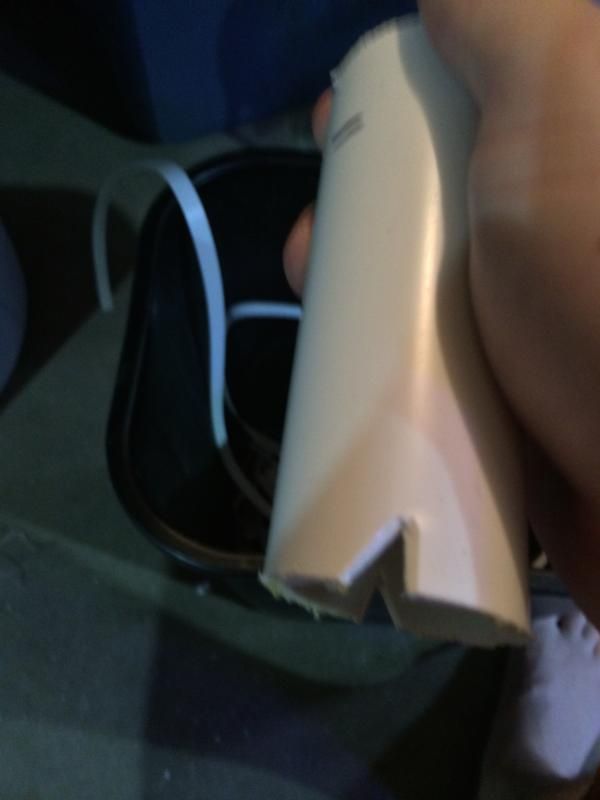
another option is to notch the pvc with side cutters, as Paul (DigitalPunk) did here:
another option, which a very good friend of mine, Amanda (NatureLady) came up with, is using plastic cups as supports, siliconed in upside down. i was hoping for her to send me a pic of how she did it before i finished writing this portion, but unfortunately, she hadn't, so as soon as i get a pic, i will update the thread. this option is pretty brilliant, in my opinion, because you can get good, strong plastic cups at the dollar store. the trick is getting enough or the proper height cups. now, you can't use something like "solo" cups, they are just too weak. you want the heavier drinking cups. think picnic or bbq stuff. since they are plastic, you can cut them down, if needed. the downside to this method is that they absolutely MUST be siliconed to the bottom of the tank, thereby sealing them completely. if you are utilizing this method, i recommend you allow the silicone to cure for 3x as long as you would normally. remember that silicone air cures, and when you seal that cup in, there is limited air, so give it more time to cure fully.
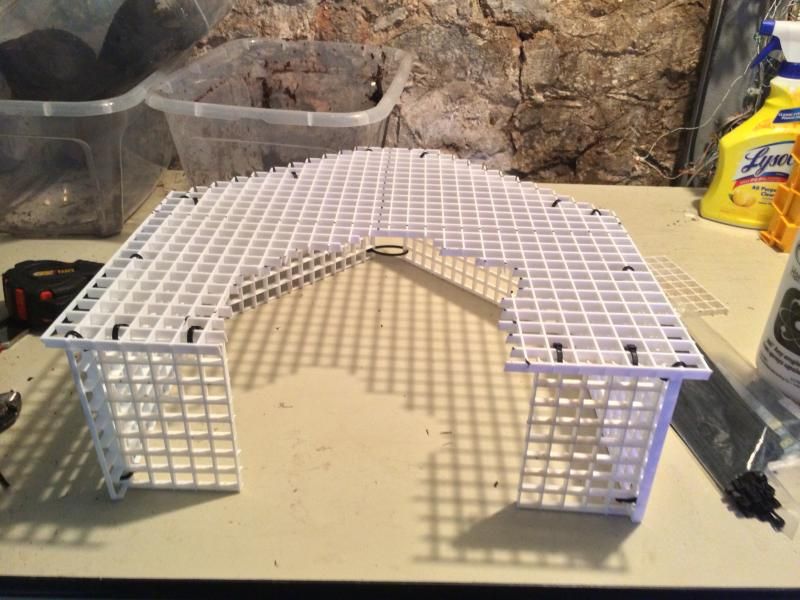
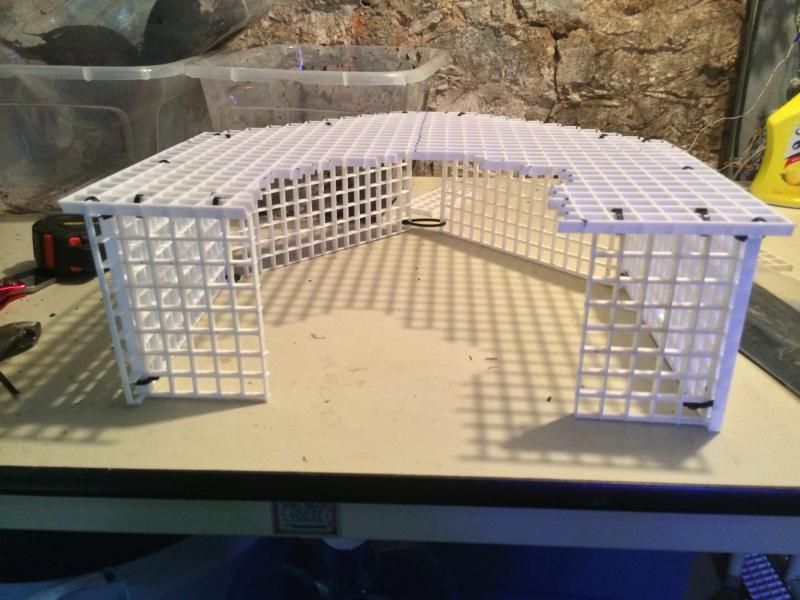
the last option that i can think of is to use eggcrate as a support as Paul did on this build:
notice that the pieces were assembled using wire ties or "zip ties". you can also use them to attach your false bottom base to pvc supports as well.
from here, we are going to move onto cutting the actual piece of eggcrate for the false bottom. this is the easiest part. just mark the eggcrate with a marker and then use side cutters to cut the slats and you're ready to lay the false bottom in. i stole more pics from Paul's build to show this:
in a nutshell, that's all there is to the basics of a false bottom.
Last edited by DigitalPunk; January 22nd, 2015 at 02:22 AM.
1.0.0 Oophaga Pumilio 'Black Jeans'
0.0.10 Phyllobates Vittatus
0.0.3 Phyllobates Terribilis 'Mint'
0.0.3 Dendrobates Tinctorius 'Patricia'
0.0.5 Dendrobates Leucomelas
0.0.2 Dendrobates Tinctorius 'Powder Blue'
0.0.2 Ranitomeya Variabilis 'southern'
0.0.3 Epipedobates Anthonyi 'zarayunga'
1.2.0 Phyllobates bicolor
0.0.3 Dendrobates tinctorius 'azureus'
0.0.1 Avicularia Avicularia
0.0.1 Gramastola porteri
0.2.0 Canines
1.0.0 Tabby/Maine Coon Mix
2.1.0 Genetics Experiments
0.1.0 Bed Bully
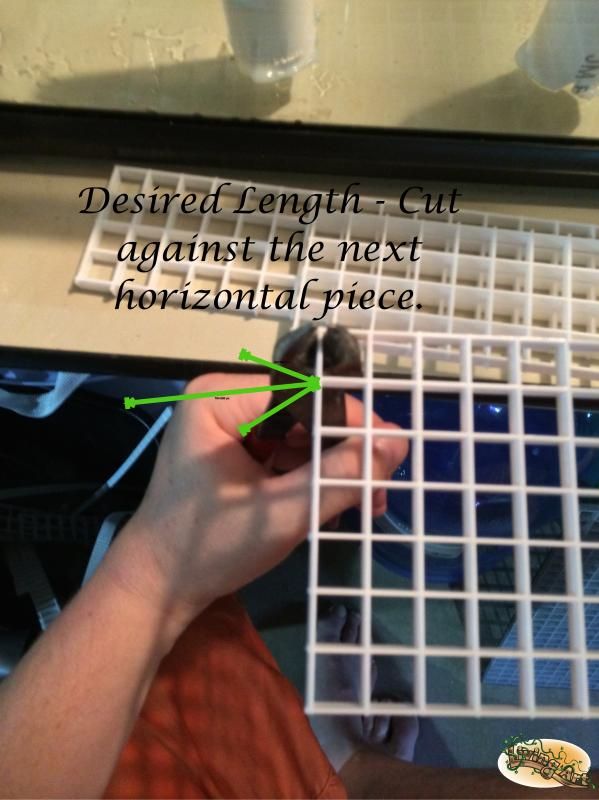
Here is how I cut the egg crate to length.
After you measure and mark your lines (covered in Bill's post above). You will need to cut them. I use a pair of side cutters for this. It is a pain to cut the lines straight with these as they are slightly angled so I do it this way.
I cut away from the line I want left. Like in the below picture.
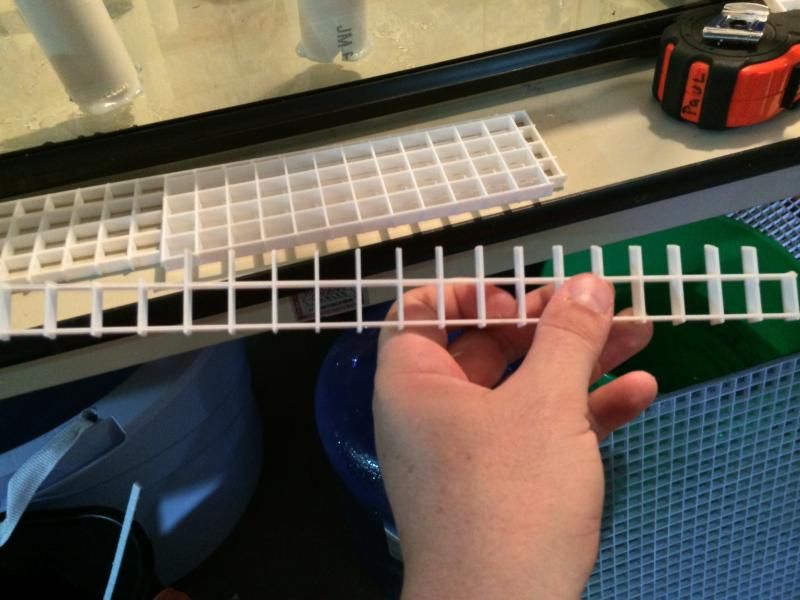
This all leave an edge similar to the below picture (important to note the pic above and the one below are not the same piece).
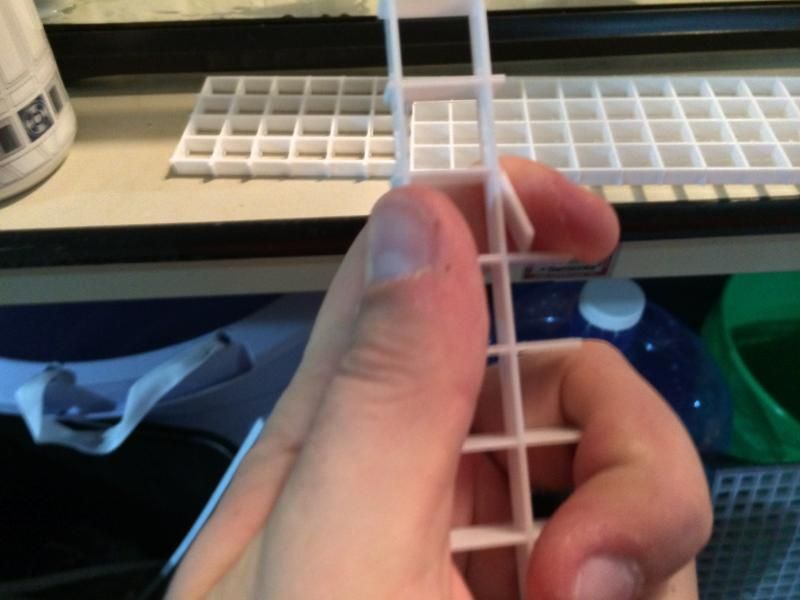
I then break off the little legs left over with my finger like this.
That is all there is to it. Super easy and almost not mind numbing
1.1.0 - Oophaga Pumilio 'Blue Jeans' (2014 Nicaragua Import)
1.1.0 - Oophaga Pumilio 'Chirique Grande' F1
1.1.0 - D. Tinctorius 'Citronella'
1.2.0 - D. Tinctorius 'Azureus'
0.0.2 - D. Tinctorius 'Sipaliwini'
0.0.2 - D. Tinctorius 'New River'
0.0.4 - D. Tinctorius 'Leucomelas'
0.0.4 - Terribilis 'Mint'
1.1.0 - R. Ventrimaculatus 'French Guiana'
Facebook - https://www.facebook.com/hashtagfrogs
Youtube - https://www.youtube.com/channel/UCgC...sEZiZQoT8sOuuw


![[Canada]](images/flags/Canada.gif "Canada")
Thanks guys I'll give this a try. All this will be going on my 'frog shelf' a cabinet built for them. So will this piping have special requirements that I need to cut space out in the side or back?
There are currently 1 users browsing this thread. (0 members and 1 guests)
 Posting Permissions


![[United States]](images/flags/United States.gif "United States")


 Reply With Quote