This was our first setup attempt. We had this tank running for a couple of months and just finished making Version 2, which is basically the same with a few tweaks here and there. I will post the new enclosure as soon as I get a chance to compile some photos together
This is how it looks now:
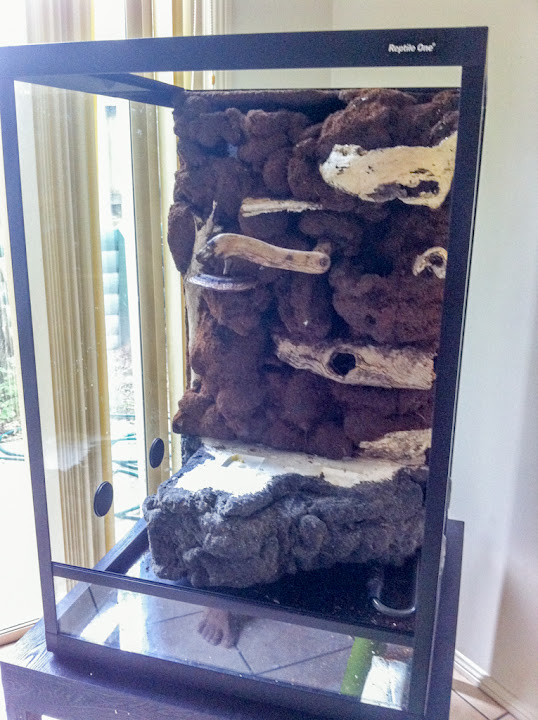
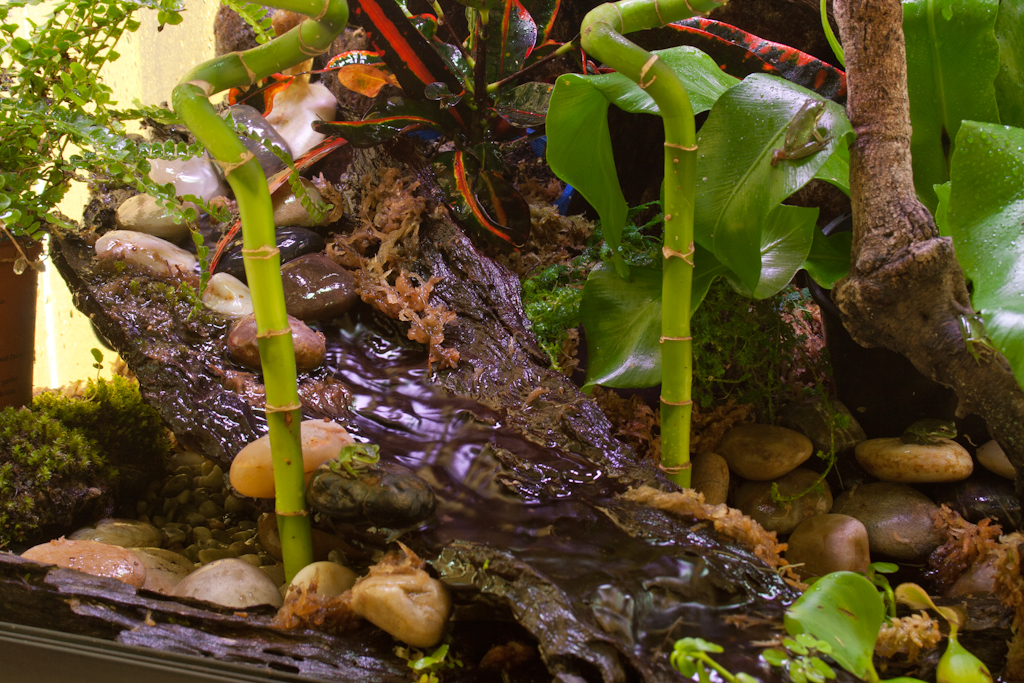
1) Tank has a false bottom made with gutter mesh - We are using some PVC pipes to elevate it from the base.
2) Laid some gravel on top of that creating a 'land' area and a 'pond' area.
3) Installed a canister filter that I'm also using to create a waterfall.
4) I have a concave piece of branch that I'm using as a 'slide' to get water back into the pond.
5) Added some plants, moss and some fish.
7) Added light. Twin tube fitting. a) Aqua One T8 "Tropical" and b) Reptile One UVB 10
Here are some photos....
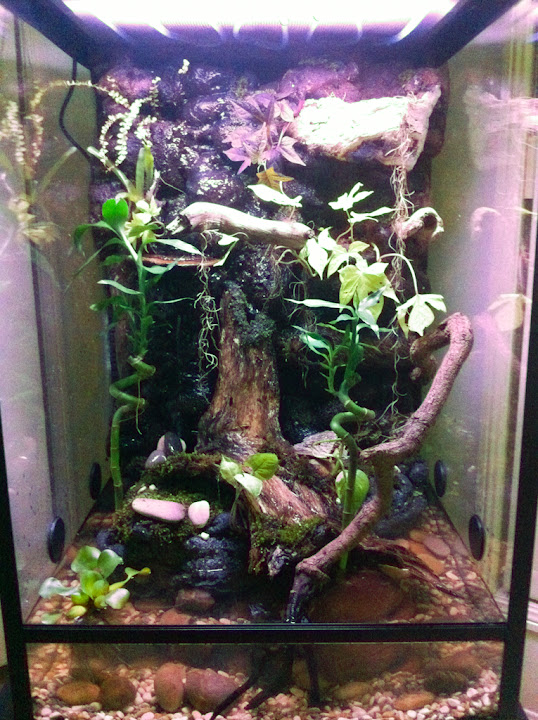
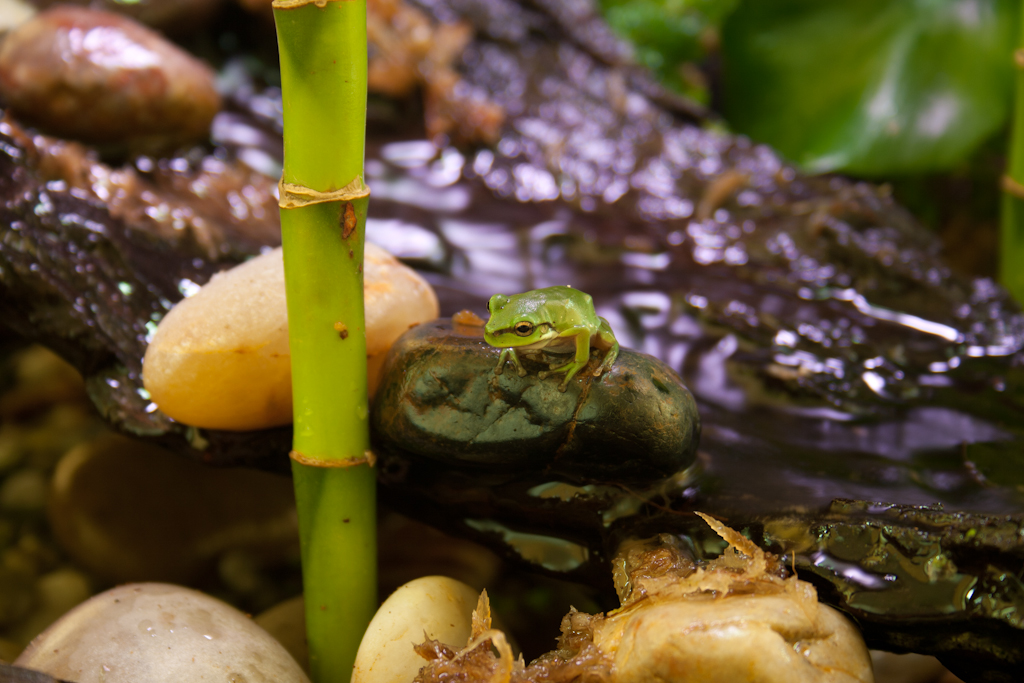
I'm happy with the 'slide' area. I see frogs enjoy getting in there, as they can get wet and jump into a rock, without having to swim.
They love getting into the big pond at night, I see them swimming and going deep and up again. Then they climb up the glass, as opposed to just using the rocks to get out... (maybe because they are tree frogs?)
Things that I'm not happy with:
1) Need a waterfall. At the moment I have a piece of hose bringing the water into the tank (from the filter). I would need to create something nicer.
I think the materials I used (styrofoam, expanding foam, coco peat and silicone) kinda worked but I failed on creating a nice waterfall. I have fixed that in our new setup.
Didn't create small pot/soil containers in the background so it's difficult to get plants to cover the upper section.
2) Pond:
The branches look great but they stain the water. I read that they release 'tannic acid' and that this is a good defence against bacteria, but makes the water look like tea (which is a pretty realistic effect, but I would prefer to be able to see the fish and some tadpoles that live there)
Still not sure how to fix this.
3) Soil
Plants are in pots now but I would love to create an environment that sustains by itself having plants on the ground.
I will post the new setup here soon
More photos of this setup here https://plus.google.com/u/0/photos/1...9709788/albums
It looks really great Nano! Good work
Thanks Kristen!
We have improved it a bit (or so we think! hehehe). I'm trying to take some photos of the new one now, but I only have my phone handy so I'll see if I can get something decent with its camera
By the way, I read in your profile that your friend is going to South America soon, I'm originally from Argentina... say "hola" from me ;-)
Yeah it looks great, it has improved.
Oh cool, I'll be sure to take a look of your new one too
I just told her then and she says "right back at ya" haha.
Thanks for these additional photo's. I am officially jealous!Originally Posted by Nano

I'm sure your setup will look very nice too!
OK.
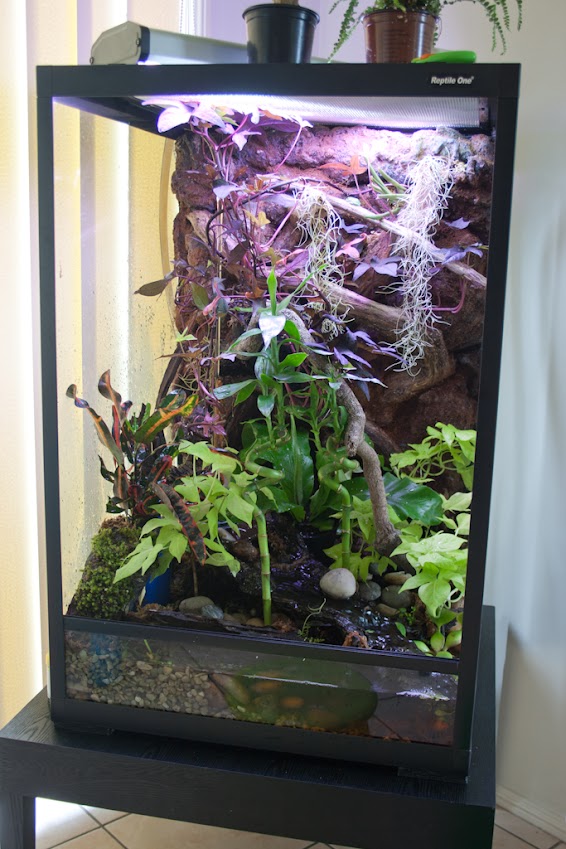
This is the new setup of our tank. We used the same method and materials that we used in the previous setup, but we made some changes (improvements?), so we'd like to call it v2 ;-)
Finally got around to taking some more photos (still a bit crappy ones as my camera is broken so I took them with the phone) ;-)
Hope you like it!
These are some pieces of wood we found in the forest behind our house...
A mushroom we found in our backyard. We used it to create a stand. At the moment water runs through it so they go there when they want to get wet
Laying expanding foam on the background together with some pieces of wood... The bottom (ground area), is a work in process at this stage... It has been cut but still needs foam to cover the front...
Testing the ground area with the background. Everything seems to fit perfectly!
The background had the front done with foam, then a layer or black pond sealant and immediately some coco peat sprinkled on top. The ground area has the same process but instead of coco peat, we sprinkled sand on top of the pond sealant.
Here you can see the area that has been allocated to the pond/aquarium...
You can also see the filter pipe sticking out. It will be covered with rocks later on.
Added some plants, moss some rocks and water
We also setup a rain system at the top of the lid. We added some aquarium tubing with tiny holes, connected to the waterfall. We also added some taps to be able to divert the water to the waterfall or to the rain system.
The pond!
Added some more aerial plants!
and also more aquatic plants
And... This is a video of the tank running - on a rainy day- ;-)
https://plus.google.com/u/0/110416584292969709788/posts/DFoswBCssS9
What type of pond sealant did you use?
I want to live in v2! I bet the frogs love it!
It turned out amazing!
You're getting the hang of this whole vivarium building real quick!
Thanks Amanda! I can see that if the rain is not on for a couple of days, when I put it on, they came out straight away under the rain! So I think they like it too!
regarding the background, I used "Crommelin Pond Sealer - Black" (Pond Sealer Colours: Waterproofing: Crommelin) but I think you won't find that in US. You might have to do a research on what fish-safe pond sealer you can find there. This one came in 3 colours, black, clear and sandstone.
The coco peat that goes on top of it doesn't always stick, so I thought that black would be better as the expanding foam was already a bit yellowish and I wanted this to look rather dark in the places where the coco peat came off.
---
Kristen, Thanks for your comments
By the way, I've been meaning to ask you for a while but I always forget. What does the coding on your signature stand for? I mean the numbers (ie 1.0.0)
Thats okay
Just try to get really hardy plants and you should be fine, (Though I have been through heaps of plants with Eddie and Kevin, they just trample on anything :P )
Its Male/Female/Unsexed
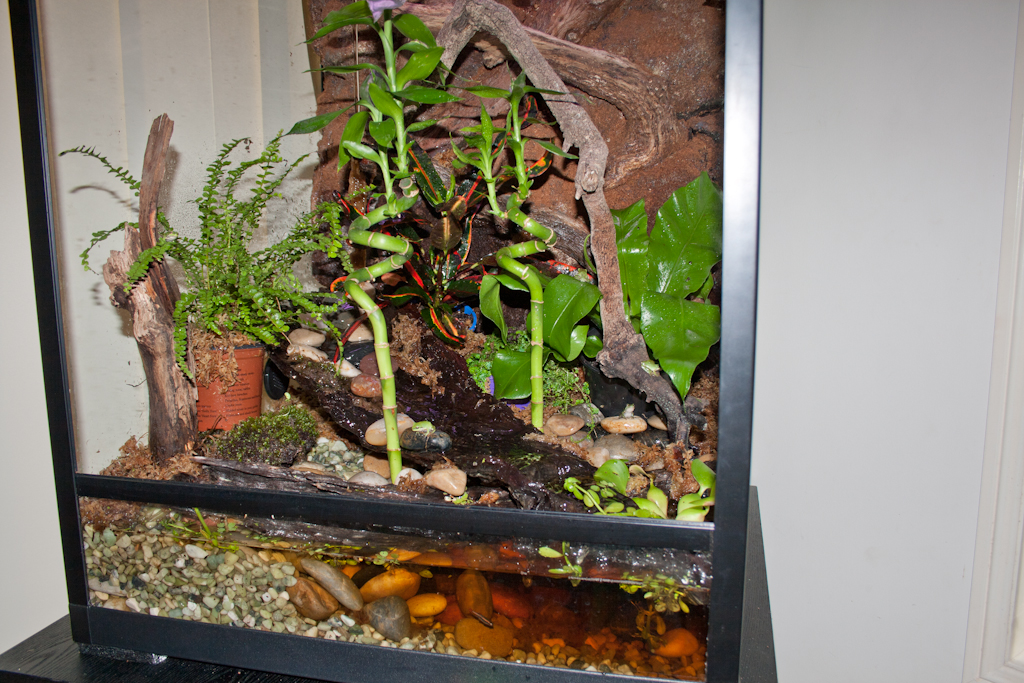
what are the black circles on the sides of the viv?
They are ventilation holes.
Thanks Kristen! I remember now, you were the one that told me that the GTFs were destroying all the plants! ;-)
The coding makes sense now
what is it though. I mean it looks like a bulkhead without the threaded end almost. Did you put them in your self or did the viv come like that? are they screened?
I didn't do it, it comes like this...it's a plastic thingy (very technical I know!) that has many little holes.
Here are some close up pictures that will explain better
The tank is the RTT669 model in the following link.
Reptile One Tanks
I hope this helps...
i like those, never seen anything like that in usa
Just realised that Reptile One is an Australian Company
Not sure what company does something similar in US.
The Exo Terra ones have ventilation but it is at the front.
Otherwise you can have holes made in your tank and put plastic vent covers...
I'm sure you can find one that will match your terrarium in ebay
Look here
Round Vent | eBay
There are currently 1 users browsing this thread. (0 members and 1 guests)
 Posting Permissions


 Reply With Quote