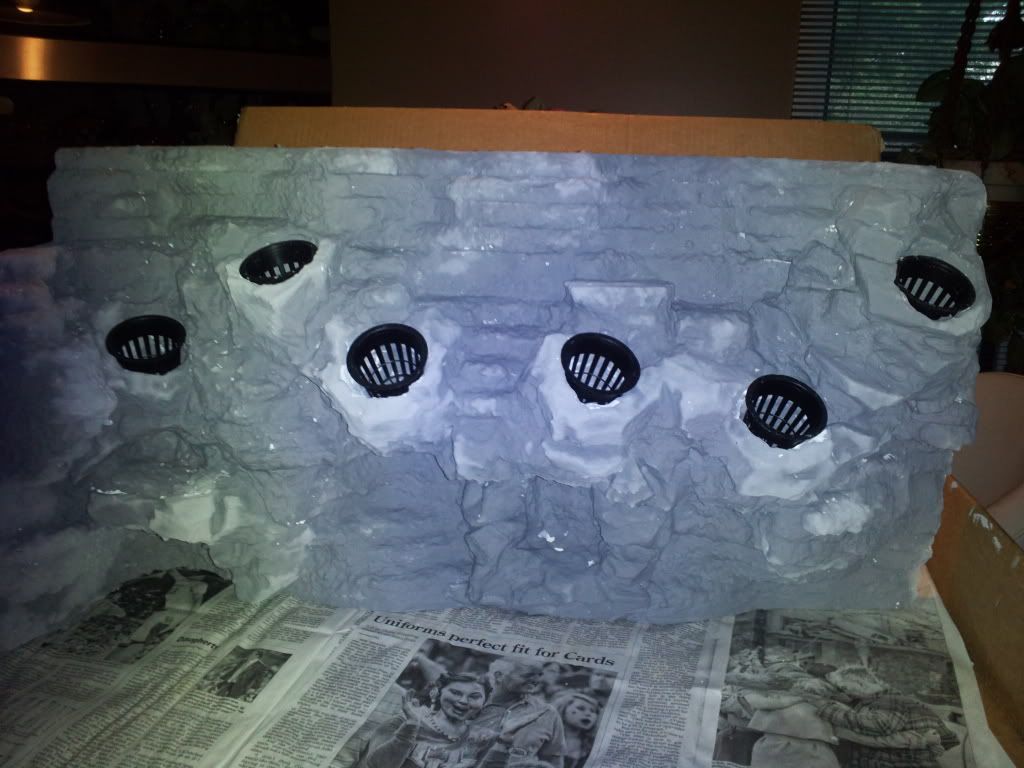
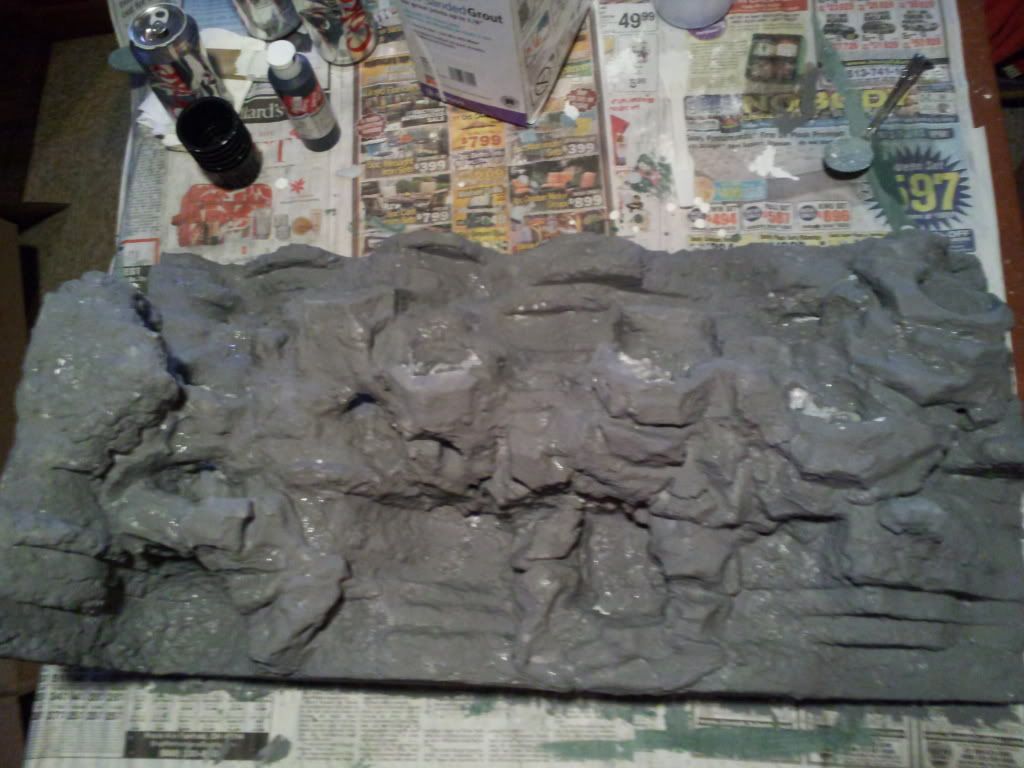
with about 4 layers of grout i think i'm done grouting. Waiting on my Shields All to arrive so i can seal the grout then paint it and seal it again.
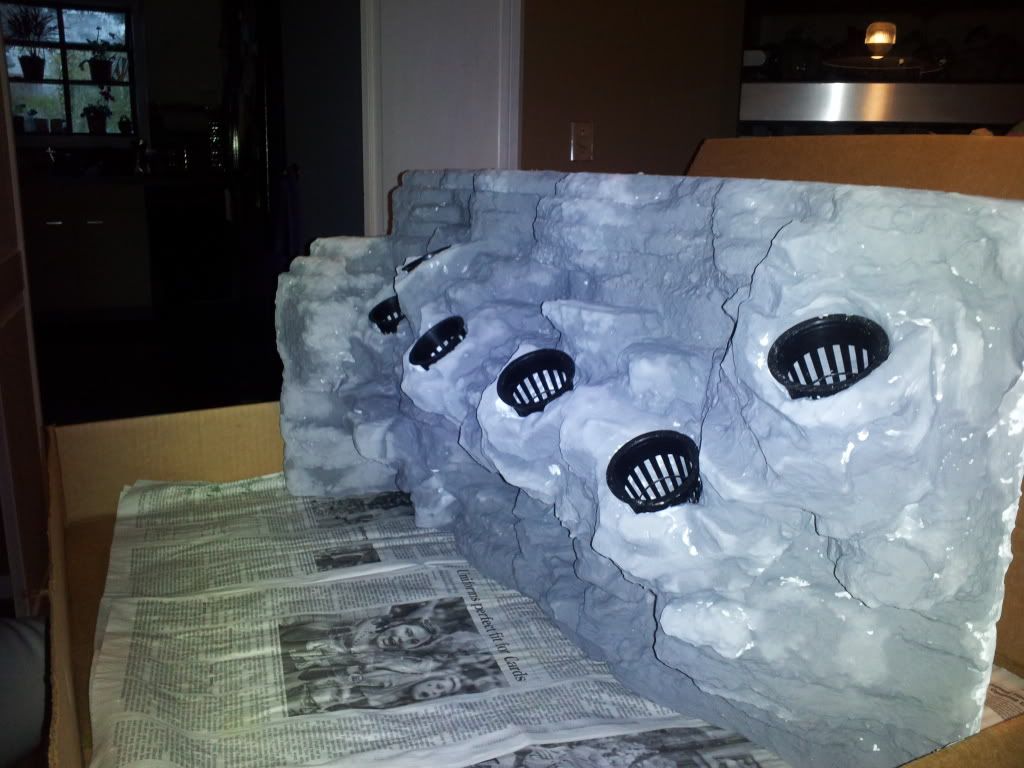
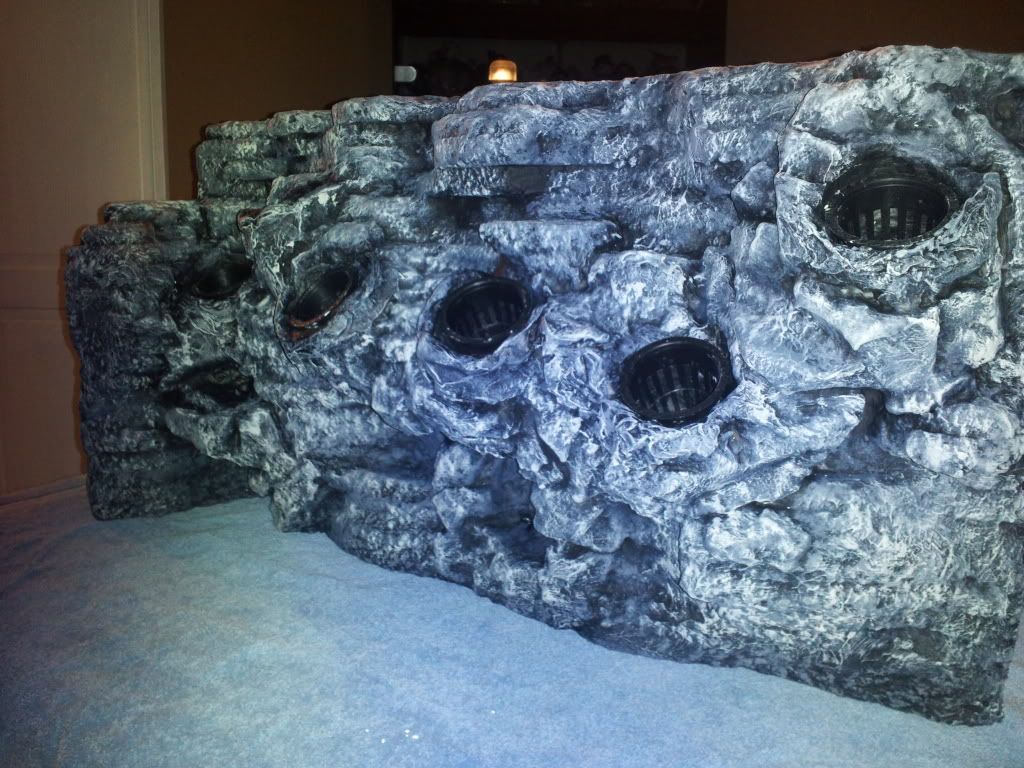
stood it up to get some better pics
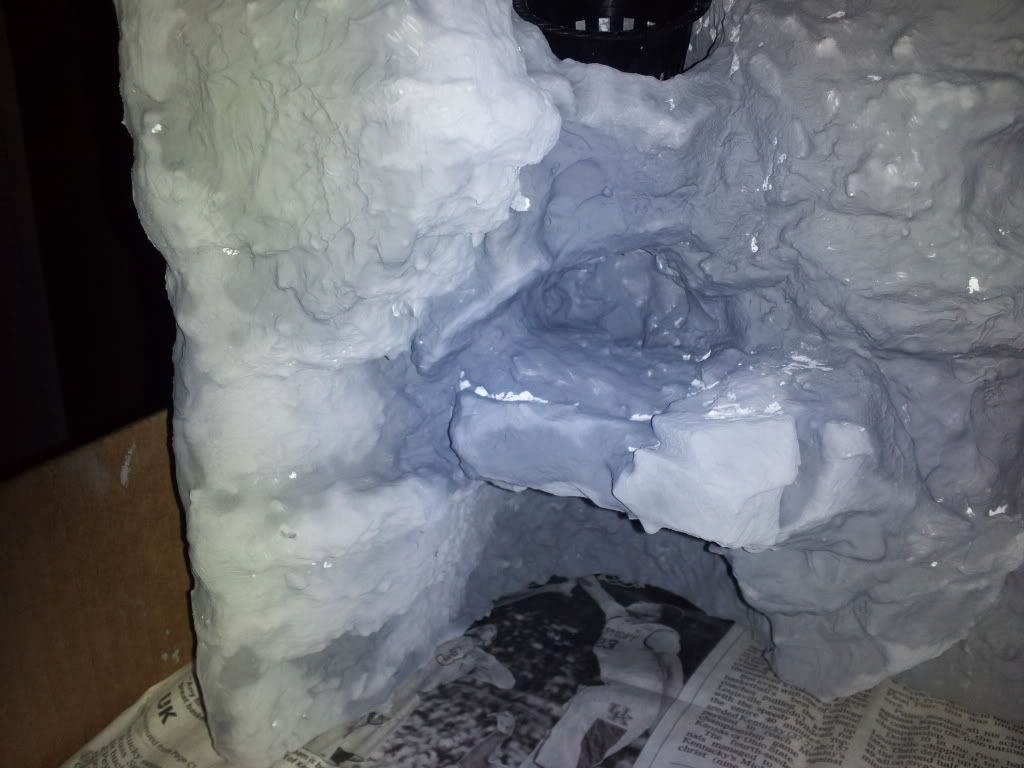
the 2 leucs that are going into this are going to love climbing this thing. I swear they think they are tree frogs
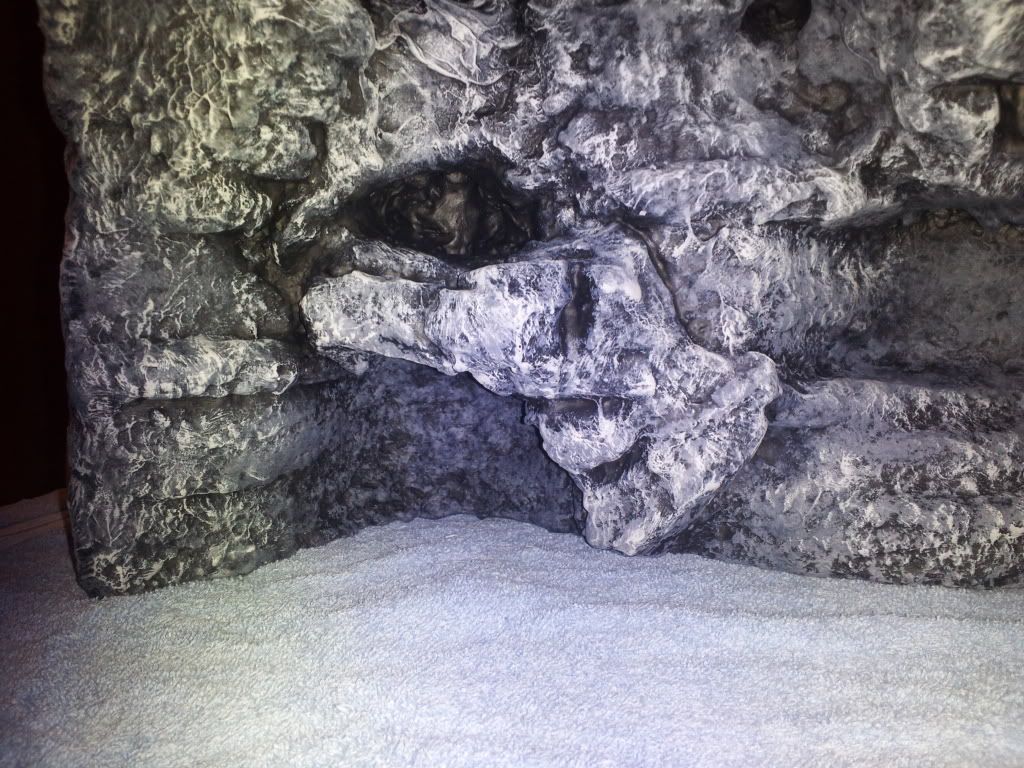
Here's a video that shows the caves a little better and my drainage for the pots
Really nice work. I like the simplicity of the drainage compared to straws. Plus those holes will never clog. I would use the net pots though. it's better to be able to move your plants around to suit them.
yeah, i'll be using the net potters
This looks really awesome! Great creativity and your babies are going to LOVE it! Quick question. What brand and type of grout did you use? I would very much like to try a background with grout. I love how realistic it appears. Also, I was chatting with a painter and he said that high quality acrylic paint for say bathrooms (behr's) is waterproof after drying and putting on 2 or more coats. Has anyone else tried using a background with only acrylic paint to seal it? I like the idea of grout then just painting several layers of paint. Seems logical to me.
Sent from my Android using the Tapatalk Forum App! It's awesome!
the grout is just unsanded grout from home depot, whatever brand they carry think its called Polyblend. As far as that bathroom paint, the question is if its non toxic? If it's made for a bathroom i wouldnt be surprised if it has some kind of mold and mildew blockers in it. I use non toxic acrylic craft paint and the Shields All which is a non toxic acrylic sealer. Shields All is not waterproof but is water resistant so stuff that's going to be under water 24/7 365 you'd want to seal in silicone or pond sealer or something along those lines
I was reading in another forum that as long as the paint is 100% acrylic then it's non toxic. Is that true in your opinion? I'll have to do more research about the mold/mildew blockers. What about it makes it toxic in builds?
Sent from my Android using the Tapatalk Forum App! It's awesome!
Wow this is awesome! I really want to do something like this with my terrarium at some point. I really think that this thread should be a sticky so that everyone can learn from this!
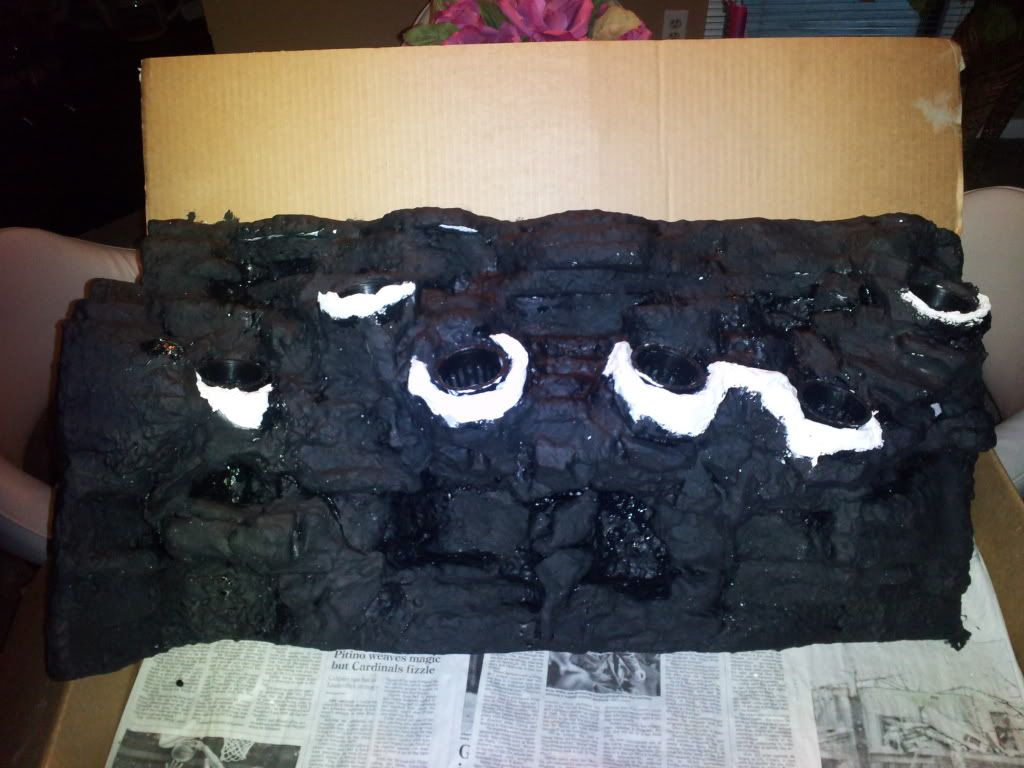
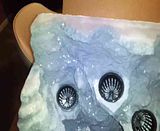
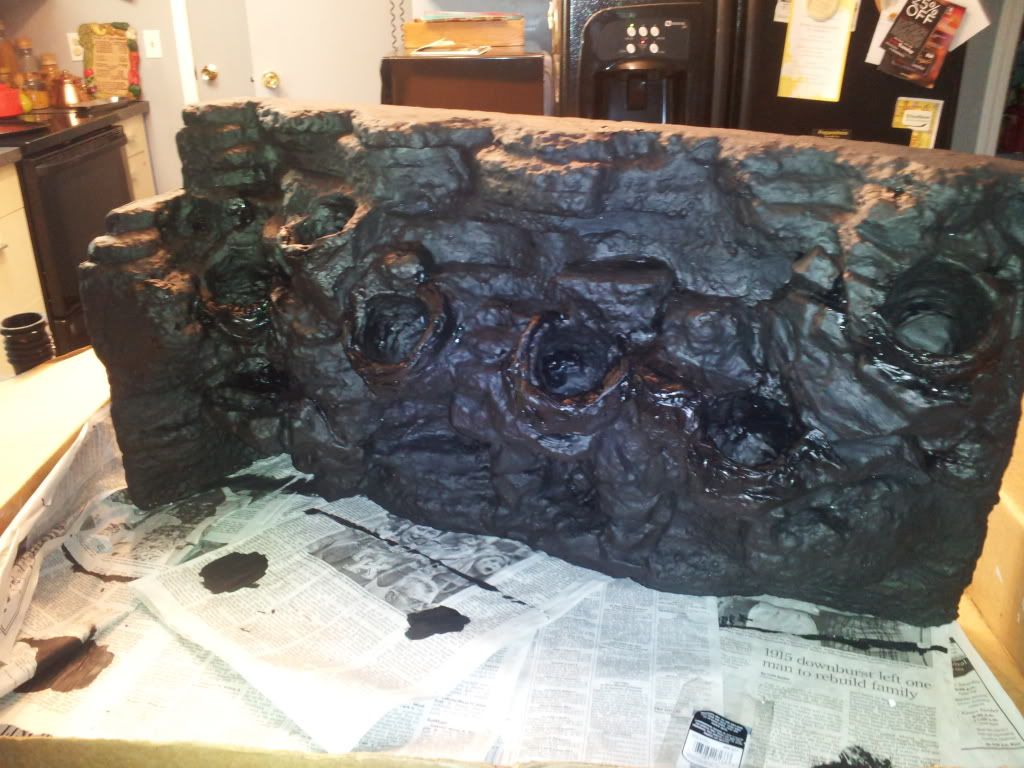
Today i made up some thick grout to do some work on the edges where the pots are. I didn't paint that part because i need to sand it a little and add a little bit more in some spots. Then went ahead and did a base coat of black. I like to base coat with black so that i can get down in the cracks and crevices real good so that when i start detailing rocks more the black in the cracks gives an illusion that the rocks go back further than they really do. This is just a single coat of black that i hand painted with a small brush to make sure i got down in all the cracks. I'll most likely mix up some more in a dollar store spray bottle watered down some and spray over the whole thing in black one more time before i start using the grey tones for the rock
taking the picture also helps me to see spots i missed so that i can go back and fill in
think we are just about ready to start with the grey tones
ok well its done, it's just drying at the moment so i can't get the final pictures until i can stand it up.
So this is how i do my backgrounds
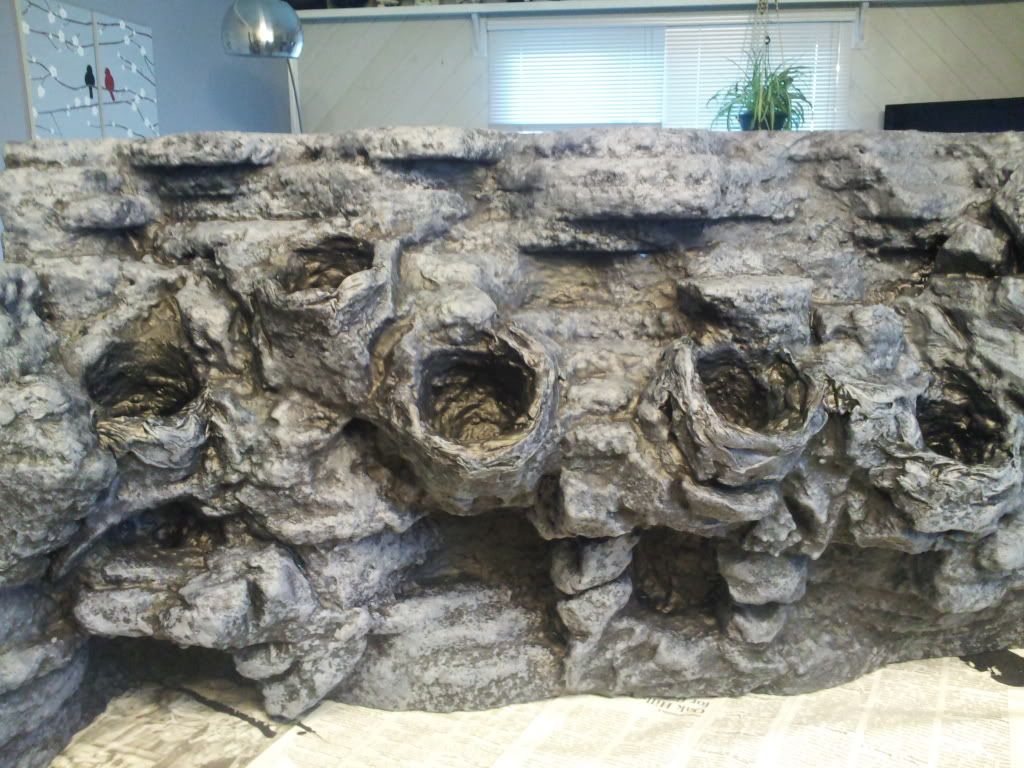
1st black was applied, i did several coats to try and cover every tiny spot of grout i could see
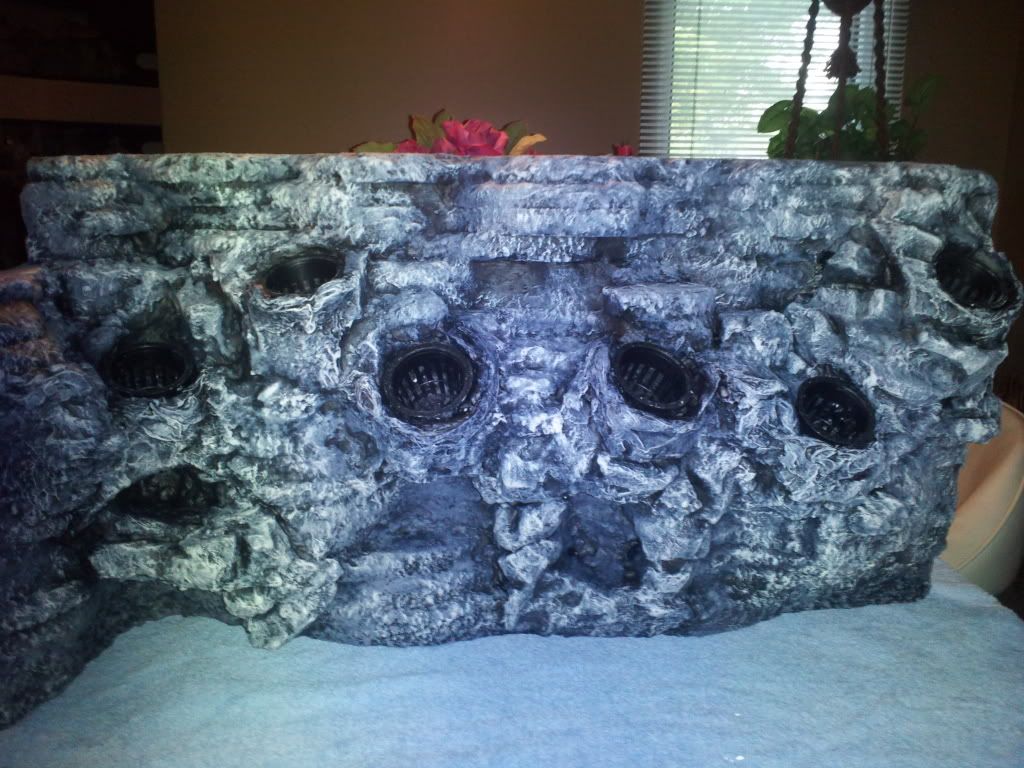
2nd i sponged on a dark grey color. These two pictures are how it looks after the grey. This is why i like to base coat in black, i think it really makes the grey show up. The pictures don't do it justice, you need to see it under 6500k lights to really see how the paint pops on this
Now this is not how it looks finished. The last thing i did was used a light grey to dry brush over the rocks. Really brings out detail and brings the rocks to life. You'll have to wait a few more minutes until its dry enough for me to stand it up and snap some pics
Wow, that paint job came out great!
Looking great! I loved watching the whole process! Thanks for sharing! I can't wait to see how it looks when you decorate it ;-)
I'm just finishing my second background too, but I did it a bit differently as I used Styrofoam base, then expanding foam, Pond Sealant and Coco Peat on top...
It's great to learn seeing how people use different techniques!
here it is with the dry brush done
I may add some green tones for algae growth but i'm not sure atm
If you do the green for algae growth water down a light green and put it in a spray bottle and put it in lower parts of the background.
i'm probably just going to leave it as is since i'm going to try and get some moss to grow on some of the areas of the background.
I'm thinking of doing the same thing too, but not sure what's the best way to do this. How do you plan to do it? Do you have to have water running all the time on those areas where you want the moss to grow, or just the humidity of the tank will be enough?Originally Posted by J Teezy

mistking heavy misting ftw
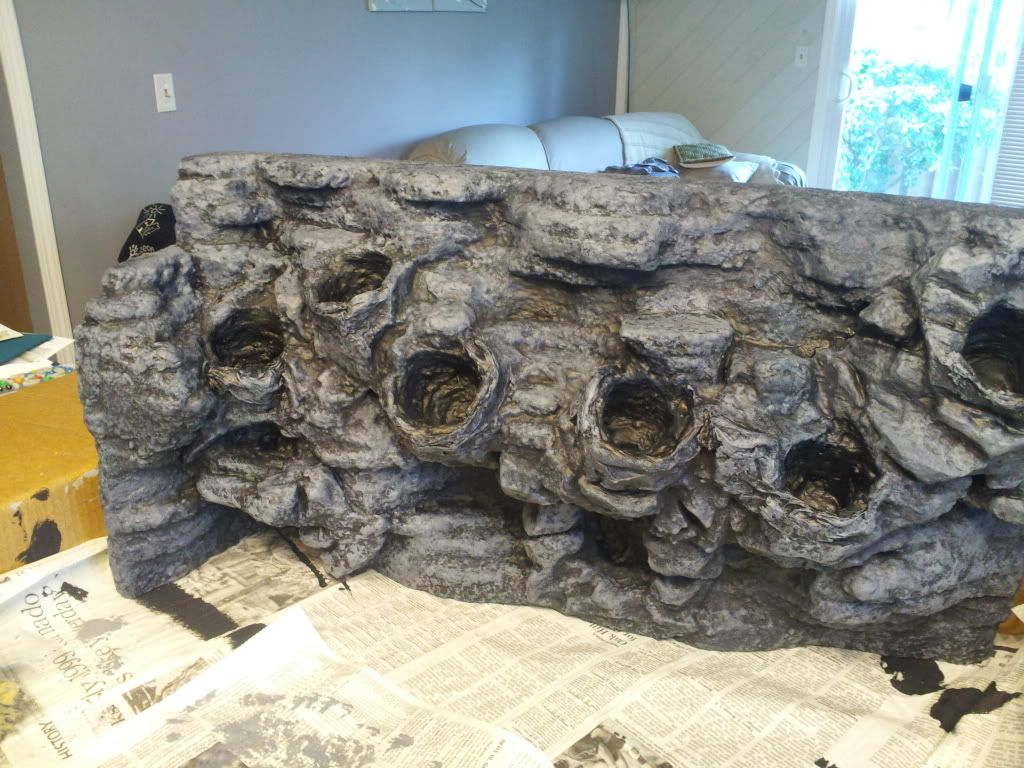
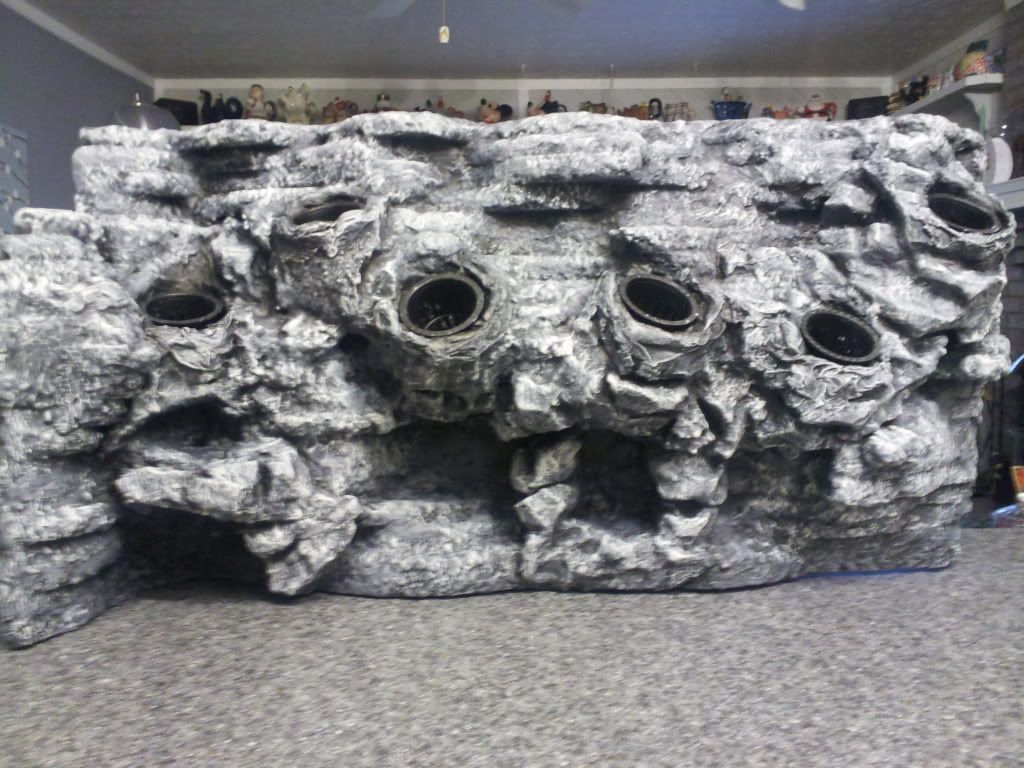
another picture in some different light. Sealant arrives tomorrow so i'll be able to start coating it. Got my bulkhead ordered and found a local reefer with drill bits so drain should be done within the next couple days
So next couple of things on the TO DO LIST is
-start sealing stage of background
-get tank drilled for bulkhead drain (going 1/2" bulkhead on this one, i did 3/4" on my last which seemed more than enough so)
-pieces are already cut for FB, just need to zip tie it and screen it
-buddy of mine in Texas owns a glass company, talking with him to see about sending me glass for my lid
once i can get the FB set and the background temporarely in place i can start on the top. Deciding on how many mist nozzles i'm going to need for this. One in each front corner for sure but i'm thinking maybe a double nozzle in the middle as well. i plan on planting moss on the ledges of the background which is going to need to be kept pretty wet so i'm thinking i'm going to need some good coverage from the misters.
Also i don't plan on having an screen vent on this build so its going to be completely sealed up (i think). I going to use a couple fans on this to keep my glass clear but i haven't decided on how i'm going to do it. i'm either going to use a method i've found over on db for having the fans actually inside the tank where i can position them how i want, or i'm going make the top so that i can have a couple fans that shoot air directly down the front glass.
Shields All came today, so i put down a coat on the top, sides, bottom, and front (can't do the back cause its laying on its back, but i'll get that later once the first coat sets up some).
My impressions of the stuff:
I think i like it. It goes on very easy. I was using a stencil brush so that i could get down in the cracks and get the hard to reach spots (i'm going to use a spray bottle for the next couple applications). It's a liquid sealer almost as thin as water (it's pretty thin) and its milky white in color. When you apply it with a brush it goes on very easy. It seems to be cloudy in some spots when you put it on but once it dries it becomes clear. If you use it just try not to leave areas where its pooling up. Brush it out as best you can. It dries fairly quick. Says to the touch in 1 hour and can be recoated 3-4 hours later. Its recommended to use at least 2 coats by manufacturer for what they think you are using it for, but since this is going in a viv, i'll be probably doing 4 coats, just to make sure i get a couple layers every where.
Now, it does have a shine to it kind of like when you seal a background with silicone, makes your work appear to be wet. Some may not like this but i say since it's in a viv with a mister where stuff is usually wet majority of the time then this really isn't a big deal to me. Now a trick to combat the shine is to sprinkle colored sand on the final coat of sealer. I did this with my 10 gallon vert background where i used silicone as the sealer. The Shields All leaves kind of a slick finish, so if your animal needs some help in the traction department sand may not be a bad idea. I think i'm going to add some again on this project at the end but i'm going to do it in a different manner. Last time i sprinkled it on with my fingers. This time i'm going to throw the sand at the background to get a bigger spread of the grains as i just want to get a light bit of sand on it. I've seen my leucs feet sliding when trying to get up the glass when it was wet before so i'm going to help them out a bit with a tad bit of traction but not alot.
Now the bad thing about Shields All is the price. It's $25 a gallon, which for me isn't bad, especially since I know its going to be safe for my frogs. The bad part is that it's only sold from the manufacturer which is in Florida so that means you have to have it shipped. The $20 for standard group shipping makes this stuff $45 a gallon. The other thing is that i'm not even going to use close to 1/3 of a gallon most likely.
so basically
Shields All = $25 a gallon
Shipping = $20
peace of mind knowing its safe for my frogs = Priceless.
There are currently 1 users browsing this thread. (0 members and 1 guests)
 Posting Permissions


 Reply With Quote